Wednesday, July 18, 2012

Woodworking Tolerances

I have been tied up pretty good the last few weeks coordinating a large project for my Habitat Chapter.  We are building five town home condominiums just south of Atlanta, all sponsored by a major corporate donor who sends many volunteers to the site to help with construction.  We sub-contract all the trades and use volunteer amateurs to do everything else we can.  It makes for a very interesting situation, but the enthusiasm and joy from the volunteers is what makes it really fun.


My current Habitat project.


This construction brings up two thoughts for wood workers.  The first is about tolerances.  One of the hardest lessons I had to learn as a newbie engineer many moons ago, was how many decimal places were required in a calculation.  If the first decimal place cost ten dollars to calculate, the next one was a hundred dollars and the third one a thousand dollars, how much is the answer worth to you?  When you are just starting out, that is not a simple question, but must be learned by hard experience and practice.

Sometimes I just want to work to the nearest inch, you know, sledge hammer type work.  I was showing someone today how to read a tape measure (yes, there are people on site who cannot read a tape measure).  I explained the inch, the half inch, the quarter inch, and the eighth inch marks and then told her that on this site today, you will not need to use marks smaller than the eighth inch marks. Even my experienced people on site sometimes over think things and spend too much time getting something to a 16th when a half will do.

Now, when I am making furniture, I am such a perfectionist that a 32nd or a 64th of an inch crack will haunt me every time I walk by the piece.  And that brings up the next thought.  Look over to the right of this missive and check out that square box of squiggly stuff.  Do you know what that is?  It is called a QR code, which stands for “Quick Response” code.  It’s used like the bar code (I once knew a zebra named “Bar Code”) on your groceries to transmit information.  If you have a smart phone, you can download an app (that’s an “application” for you Luddites) which will read the QR and act on the information contained in it.  In the case of the one to the upper right, it sends you to the  Highland Woodworking blog site on your smart phone so you can read about Highland any time any place.  Maybe even buy some tools.

I have embedded a QR code in this blog for you to try.  Ask your kids or grandkids to help you with it — they already know.  See if you can figure it out.  This same one hangs on my office door at Habitat and I have actually become quite well known for it.  It combines the two thoughts above as to what tolerance is required on any project and is the distillation of many years of engineering experience and practice and of working on at least 85 Habitat homes.  I think it sums it up pretty well.  See what you think and let me know.  Write your answer on the back of a twenty dollar bill and send it to me in care of Highland.

Saturday, April 28, 2012

Shaker Candle Stand

Some things don’t need fixing.  Witness “New Coke” in Atlanta about 25 years ago — somebody thought they could fix Coca-Cola.  Duh!!  How would you improve a ’57 Chevy?  Did anybody give Elvis singing lessons?  Who would have stopped Fred Astaire and Ginger Rogers and said “Wait, you’re doing that all wrong: you dance backwards and let her dance forwards, and by the way, lose the top hat and cane.”?

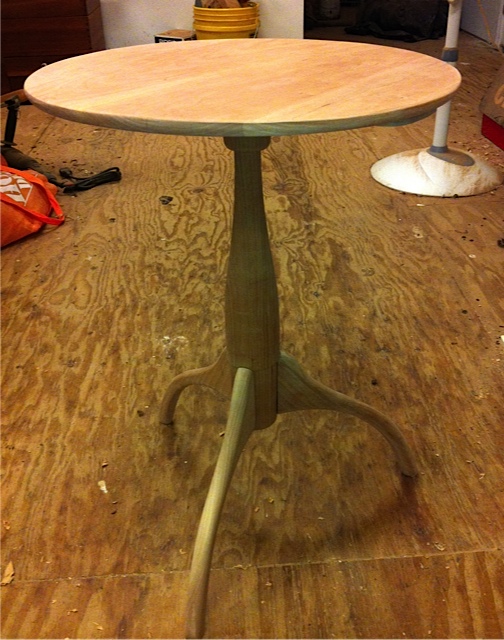
I have been working on a Shaker Candle Stand the last few days and I Googled it for some reason.  Do you know how many people think they can improve on the original?  Listen, Homer, it is done.  It is completed.  Do not sit down and say, “I think I will re-design the Shaker Candle Stand — I can do better.”


My Candle Stand


You cannot add ball and claw feet to this thing.  You cannot carve deep philosophical thoughts into the top of it.  Do not add fancy gingerbread brackets to the underside of the table.  If you simply cannot resist, then go carve clown faces in your hope chest.  The candle stand was completed 200 years ago and it is done.  I don’t have a problem with trying to improve your technique, make the dovetails better, upgrade your skew skills on the post, that sort of thing.  But nobody has improved on it in 200 years and I can tell you, Ralph, you are not going to help it.

Go watch the Roy Underhill video on making one of these babies and listen to St. Roy expound on the shape of that marvelous center post.  I love this little table, it is probably my favorite thing to try to make and I have parts of one going nearly all the time in my shop.  The dovetails are difficult for me, but I will get better.


Hancock Shaker Village Table


A couple of years ago I went to New England to take a class and while there I went by the Hancock Shaker Village for a tour.  They have a beautiful Candle Stand there and it is the one I try to make each time.  If my effort does not match this beautiful example, it is a lack of skill on my part, not because I think I can improve on it.

What do you think?  Let me hear from you.

Monday, March 26, 2012

Carving a Gargoyle

Everybody needs their own gargoyle.
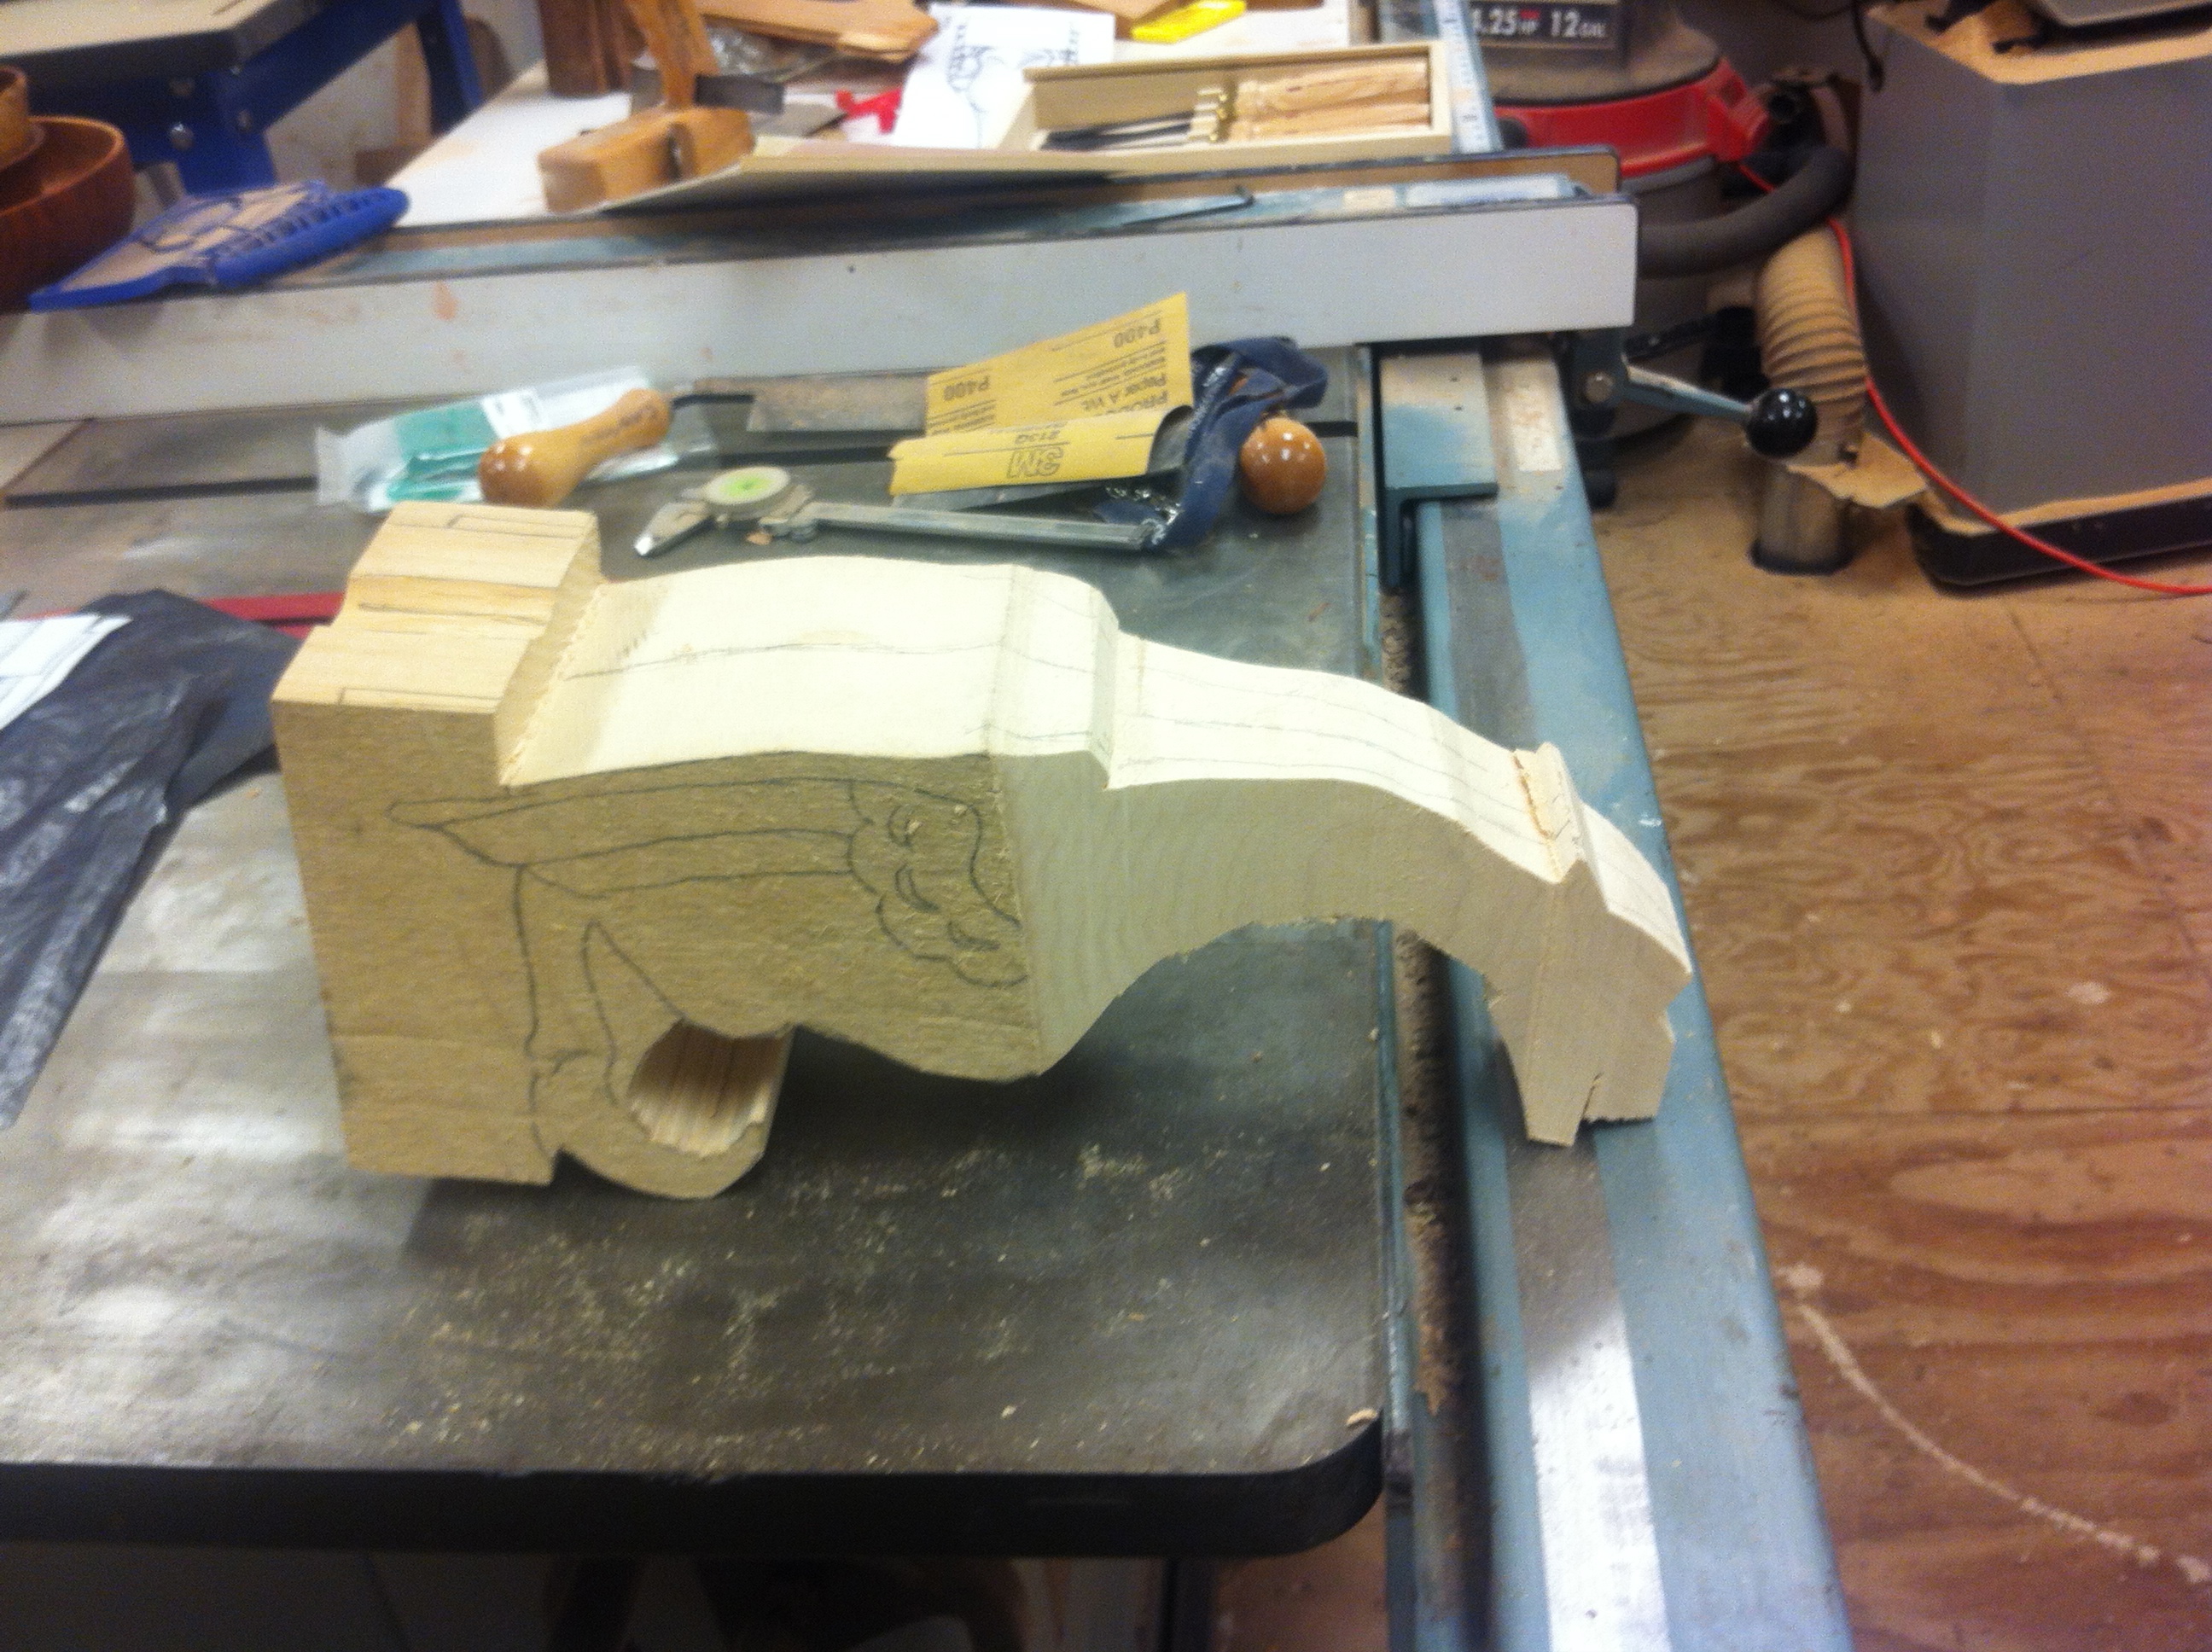
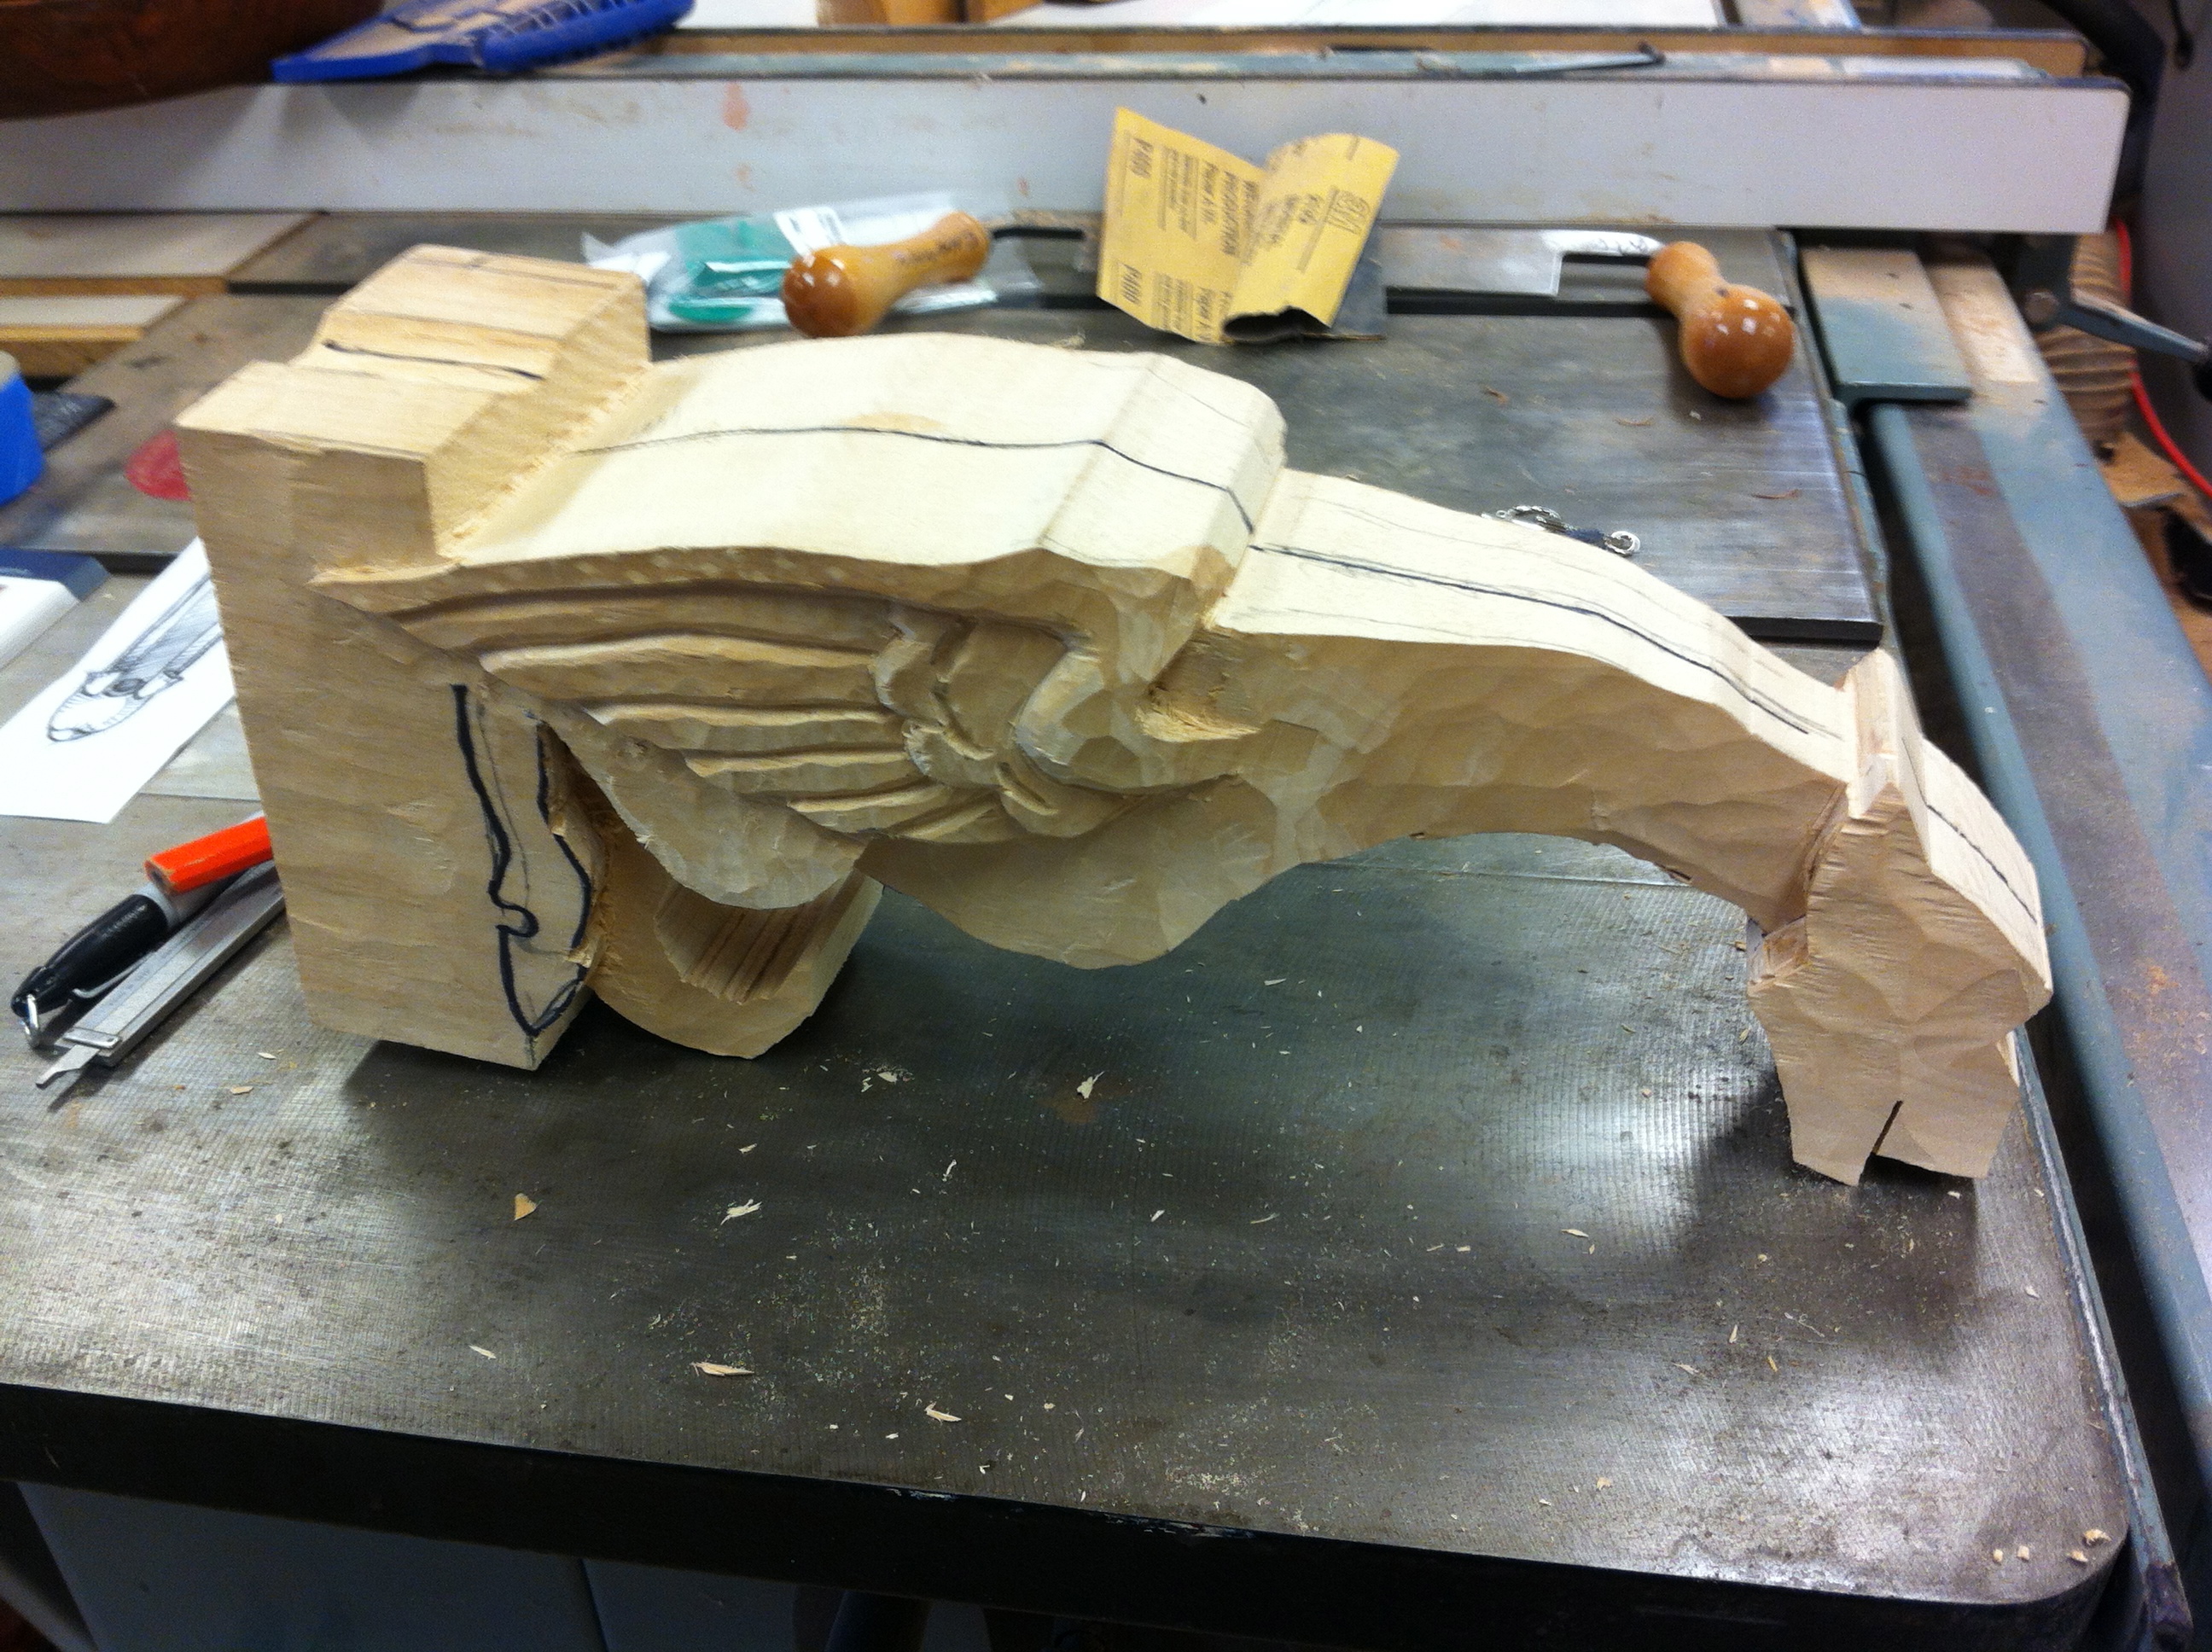
I bought some basswood at the wood store a few months ago and about two weeks ago, went to the High and got a six piece set of Flexcut carving tools.  I found a pattern I like in a book and decided to go after it.  After roughing it out on the band saw, I went after it with the carving tools.  I really like it.
Just off the Band Saw – what do you think?
Still a ways to go, but not too bad for the first gargoyle.  Least it’s not rock.

One Side Roughed Out

Monday, March 19, 2012

Making a Spoon by Hand

  I have been thinking about dipping into spoon making (Wow, did anybody not see that one coming?) for a long time.  A couple of months ago, I finally did it and I think I like it.
Several things got me started — Peter Galbert on his website shows how he makes spoons during those long cold winter nights by the fireplace up there in far north Massachusetts.  Then he sells them to benefit a favorite charity.  Go to http://chairnotes.blogspot.com and search for spoons in the list at the bottom right or click “Spoons for Hunger” at the top right of his page.  His spoons are beautiful and painful to me as I am reminded of how far I have to go.
Another source for spoon making ideas is Robin Wood in England.   Go to http://www.robin-wood.co.uk/ and see what he has to offer.   If I lived in England and did wood working, I would call myself Robin Wood.  I love his bowls, too.  He uses a foot-powered lathe to make bowls and you saw them in that recent Robin Hood movie with Russell Crowe, the one with the medieval wooden Higgins boats the French used to invade England.  I laughed out loud.  Robin gives classes and next time you cross the pond, you can sign up.  He does beautiful work which is also painful to me.
Try Roy Underhill’s “The Woodwright’s Shop” for his current season show #3108 with Peter Follansbee on carving Swedish spoons.  The main thing I learned from this one is to use green wood (duh!).  I mean I did not get that when I started.  I was picking up old chunks of wood from around the shop and then dust was flying everywhere and I never got it done, and my admiration for spoon carving was rising all the time.  I was about to give it up as too hard and too much trouble when I watched Roy and Peter and they set me on the green wood path.
The fourth source is Drew Langsner over at Country Workshops in North Carolina.  Go to countryworkshops.org and check out his videos and maybe you can sign up for a class.
When I first started looking and learning, all the instructors used traditional tools to carve spoons.  You start out with an axe and then move to a carving knife and a curved hook knife, a spoke shave and anything else with a edge that will remove wood.  Took me about three days of effort before I discarded some of that junk.  I finally went to the band saw, a hand grinder and the spindle sander — anything to get that wood off there.  If I could make the chain saw do it, I would.

Splitting the spoon blank.
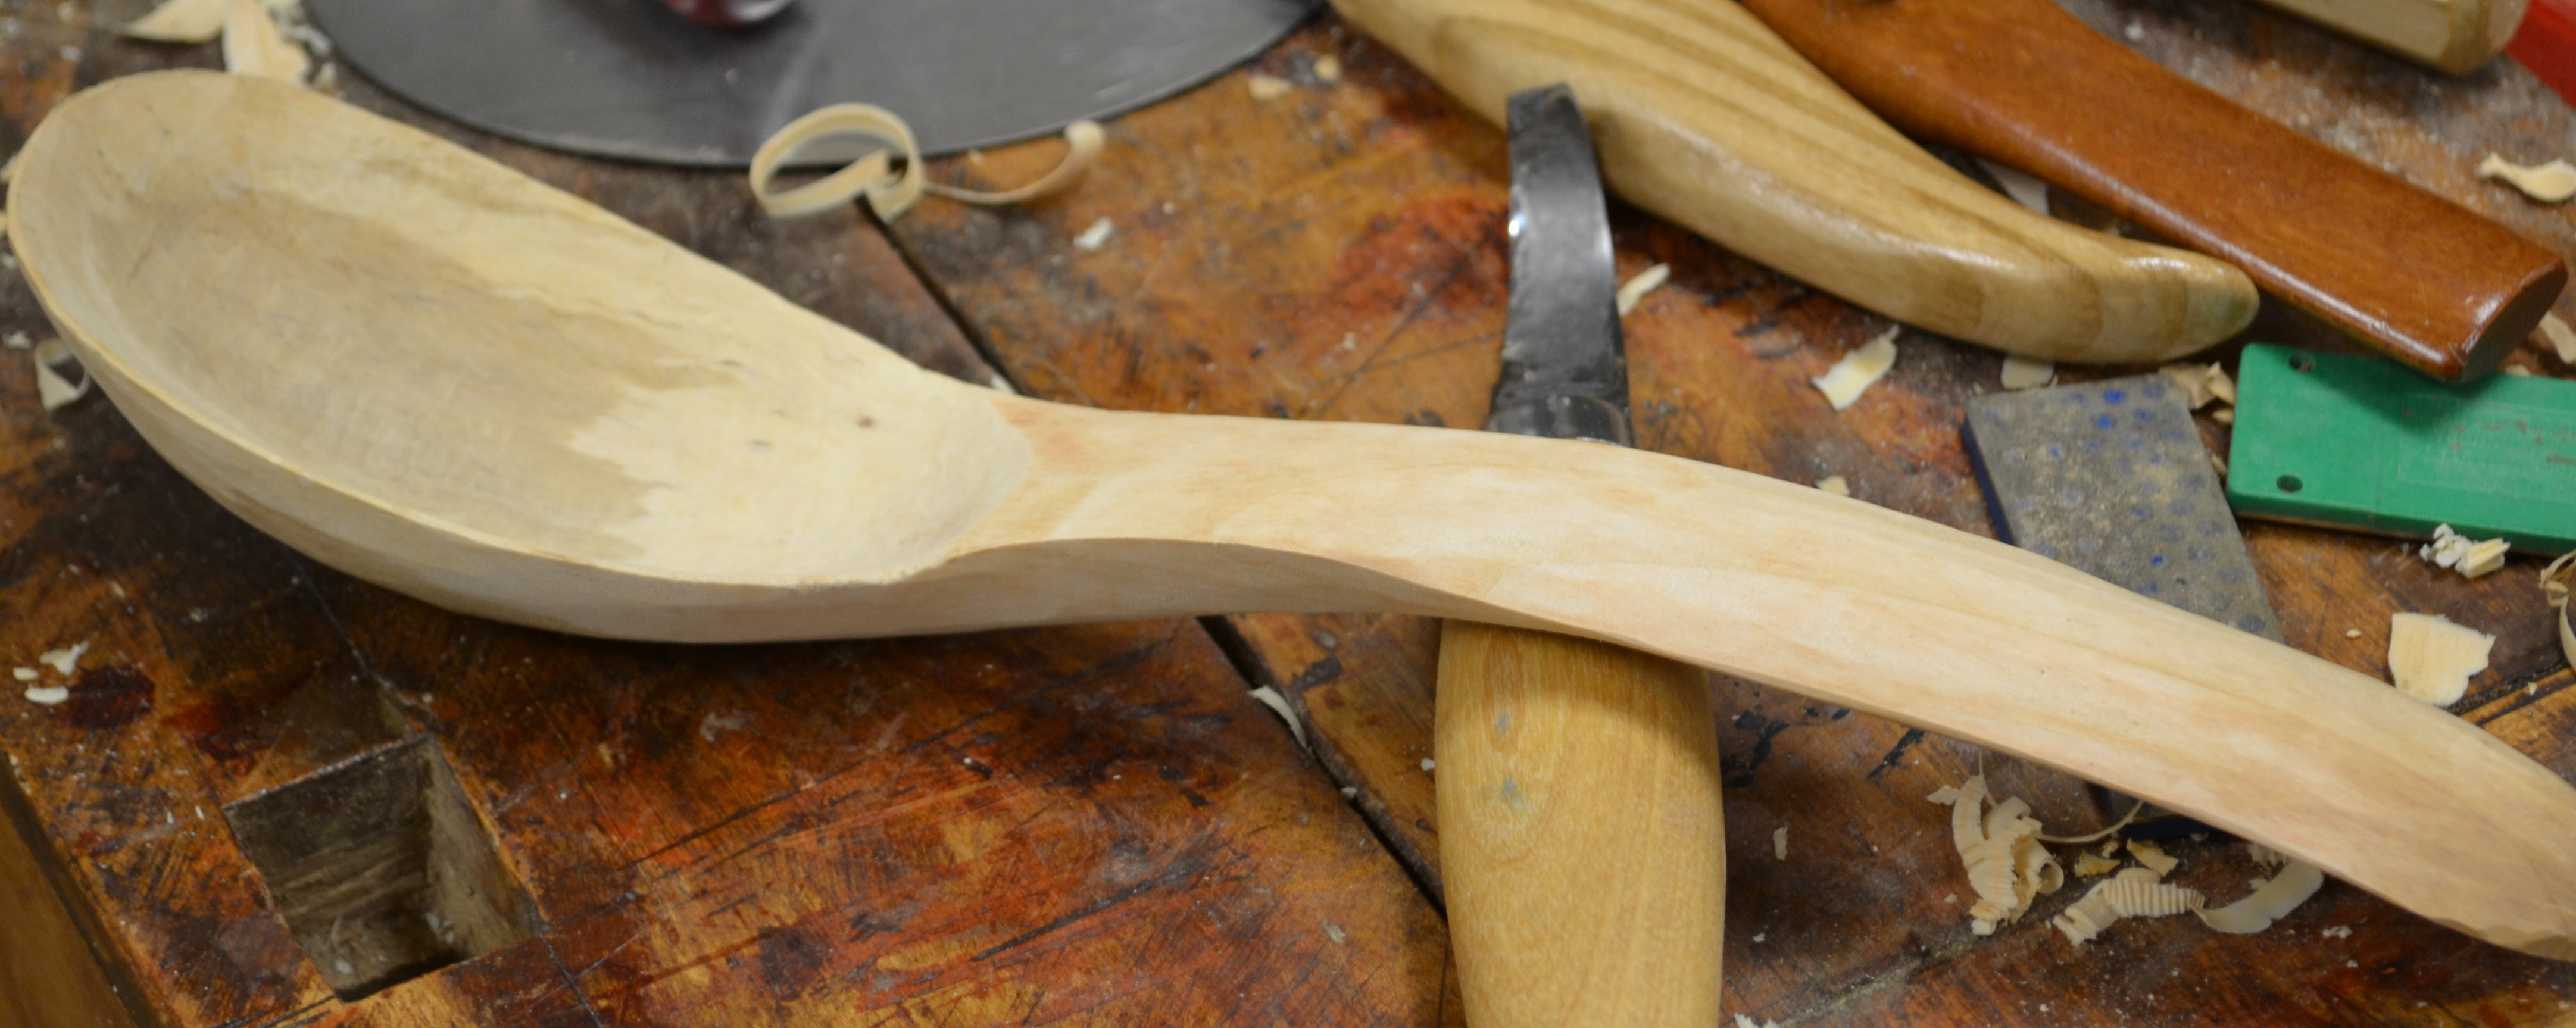
I had some green Bradford pear wood that I got when a tree blew over at the office.  I split it out to a suitable blank and sketched a shape I liked from one side and then from the top and put it on the band saw to get the basic shape.  I moved to the axe (from Highland) and a stump (from the yard) and started hacking away.  Surprising how much wood (or fingers) you can take off with an axe while still maintaining control of the work.  I found the trick to a good spoon is getting it thin enough to make it look delicate while leaving it thick enough to be strong.  I like a shape which is wide horizontally at the handle and tall vertically near the bowl.  The transition between the two is lovely when done right.

Roughed out on bandsaw
The tools I used are some I already had around the shop including the short axe, and a spoke shave.  The other odd group of tools is a set of Exacto hobby tools which are small and very sharp, and include a small spoke shave which is marvelous for final shaping, and a round head cutter sharpened on one side.  I went to Highland and bought two new tools which are really nice for the work.  One is a small carving knife which came very sharp with no need for honing.  It works like a champ.  The other is a curved hook knife which is used for hollowing out the bowl of the spoon.  I was surprised at how well that little knife worked.  You can see all the tools in the picture.
The single biggest problem is holding the work so you can carve on it.  Roy Underhill showed how you actually carve the bowl first since it is the hardest to shape.  Plus you can clamp the square handle in the bench vise so you can work the bowl.  I found there is a delicate balance between holding and carving, and eventually you end up holding the whole thing against your chest while you carve.  One of these days I will have to make a shaving horse which I think will work better without breaking the spoon.

Almost ready to go.
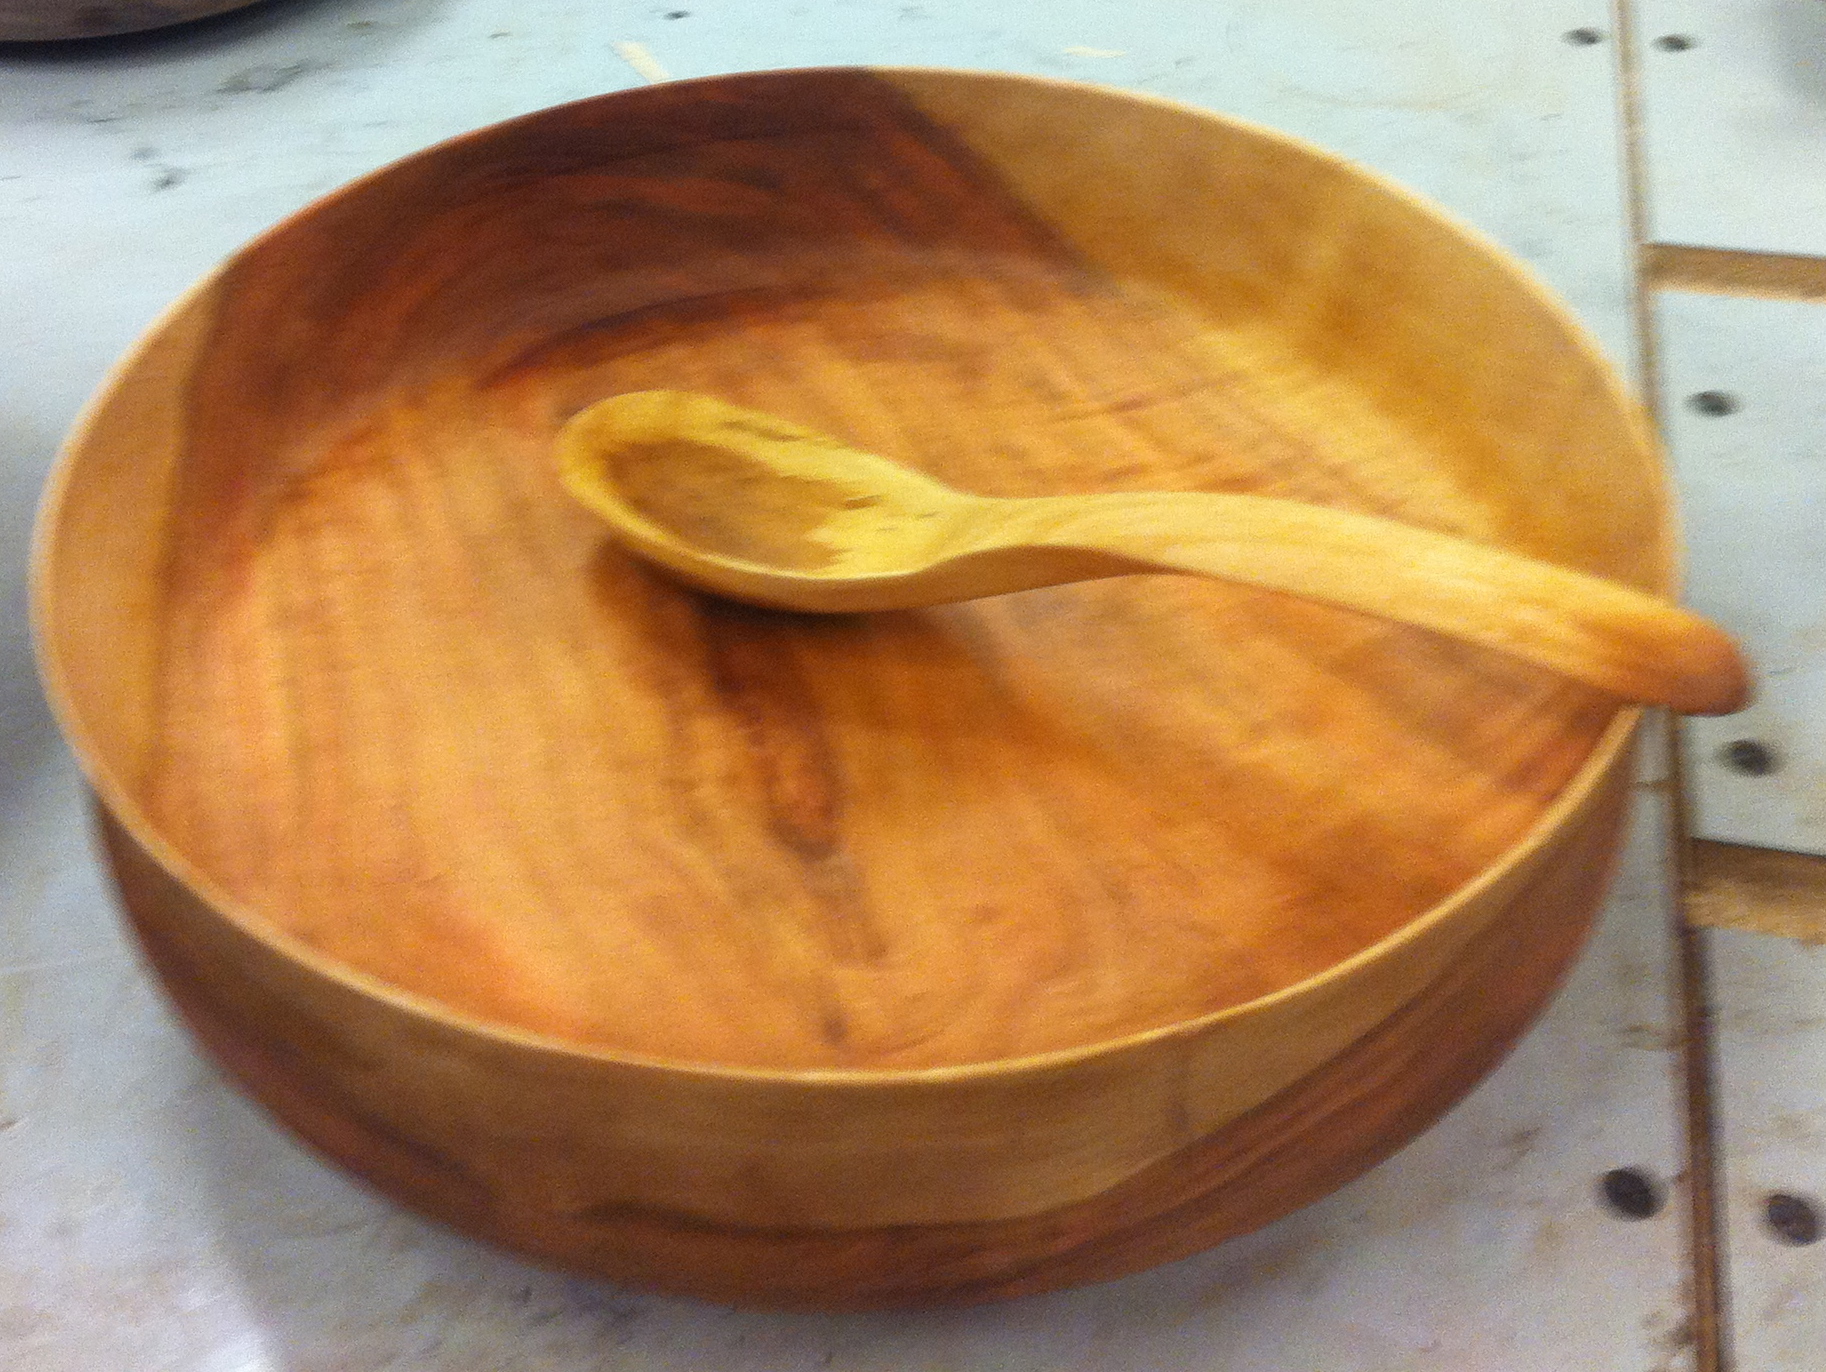
As I said, I am not proud and I will use any power tools I have to get the wood off.  I did learn to wrap the unfinished piece in kitchen plastic wrap to keep it from drying out until I get back to it the next day.  So far it takes me about four or five hours over a couple of day to get one done, but I think I will get faster.  I have done about four spoons so far and the last one was pretty good.  I had a bowl out of cherry that looked really nice and I noticed the spoon matched the bowl, even though they are different species.  It made a really nice bridal gift.

The bridal gift.
Think you might like to make a spoon one day?

Friday, February 17, 2012

Curves on a Table Saw

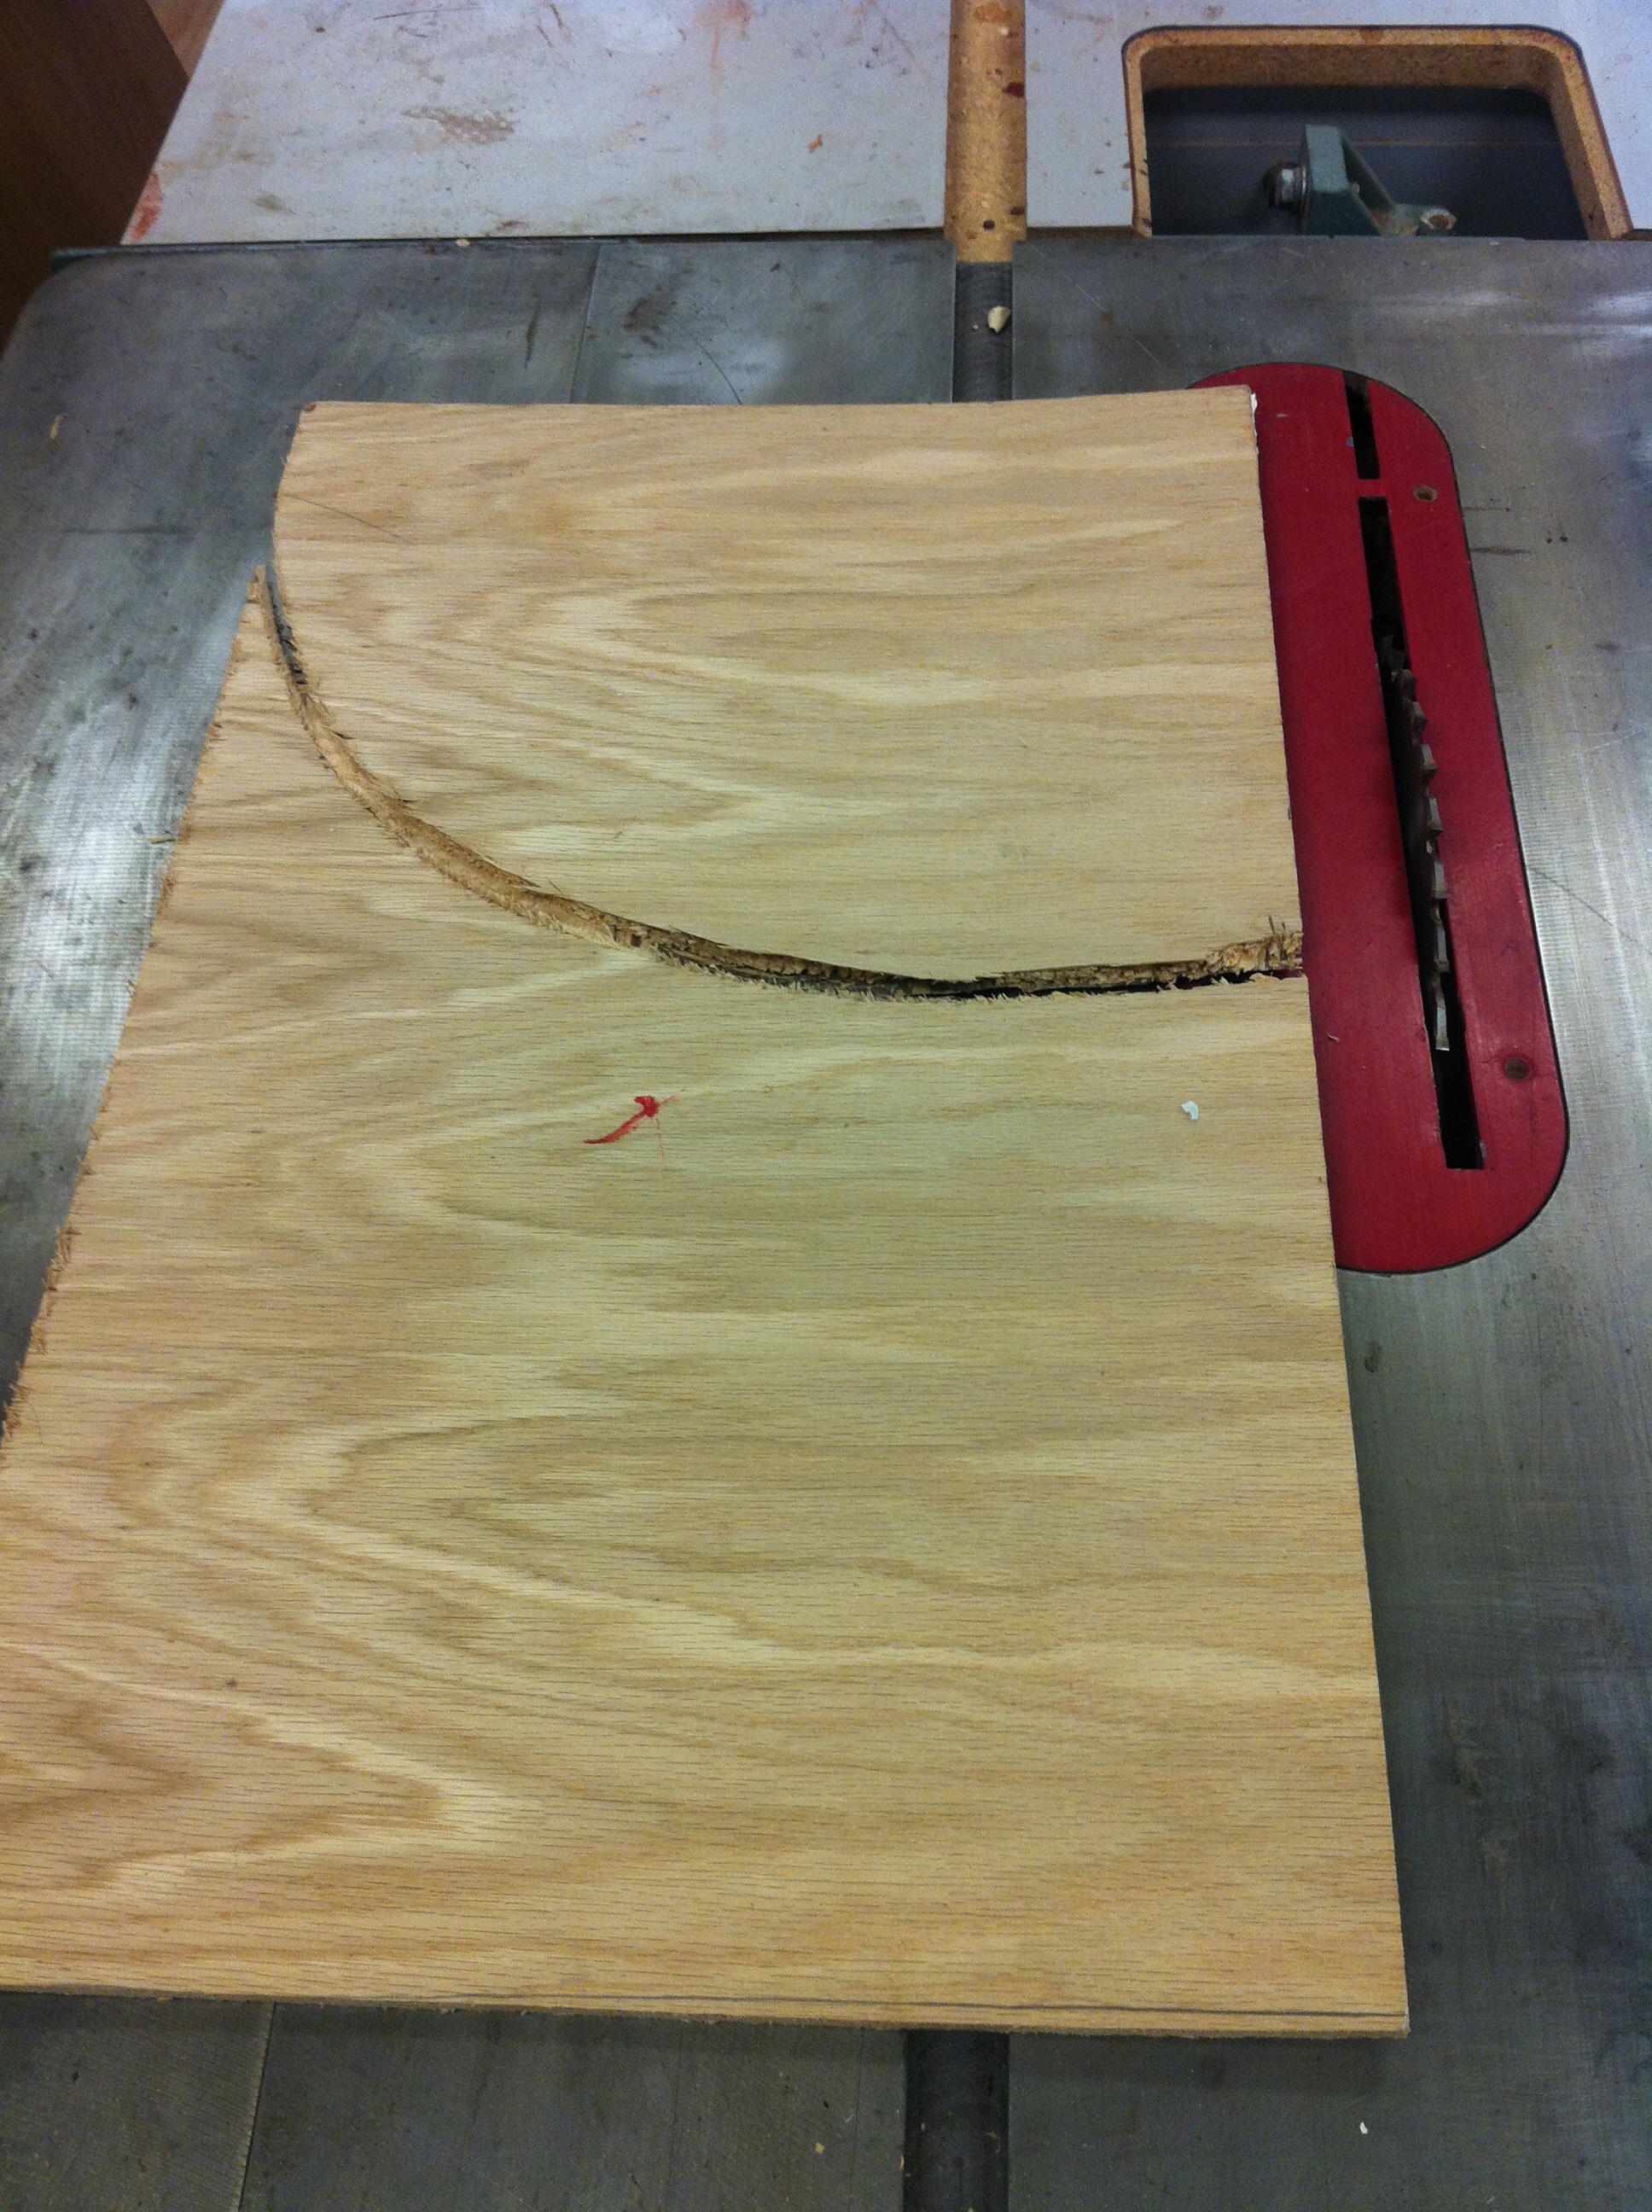
  Bet’cha can’t do this.  Not many people can cut a perfect arc on a table saw in a thin piece of plywood.  Notice how the cut is just the right depth to keep the ply together.  Notice how the cut starts in from the side perfectly tangential to the arc.  Notice how the cut continues all the way across the workpiece in a perfect arc.  Notice the small blood stain in the center of the piece.
Perfect Arc on the Table Saw
Maybe you have guessed by now this is a terrible mistake and a big screwup.  I was cutting some pieces of plywood for our annual family gingerbread house construction and I failed to pay sufficient attention near the end of the cut.  It got away from me in about one tenth of one second and the next thing I knew it was bouncing off the back wall of the shop about 15 feet behind me.  Thank goodness I was wearing a face shield and standing to the side as I always do.  The only damage, besides my ego, was a broken fingernail and a pretty good scrape to my ring finger from the flying plywood.  That thing took off like a helicopter, flew just past my head, all the way across the room and banged into the wall near the ceiling behind me.  It was brutal and scary and reminded me all over again how potentially devastating a moment of carelessness can be in the shop.
I am sure that many of you out there are looking at my saw and noting the lack of a guard and splitter at the blade.  You are right and I deserve that.  But for all you beginners out there, note this.  I am an experienced woodworker who has used a table saw for years and I know how this kind of kickback happens.  It happens because I took off the splitter behind the blade and the piece twisted and the back portion of the saw caught the wood and threw it back at me.  But you see, I was just going to use the saw for thirty seconds to make a base for a gingerbread house and it was not a real project,   and I know all about this stuff cause I write for Highland and I don’t need any advice from you.  That kind of thinking is what gets you hurt.  Leave the guard on your saw or at the very least, get an aftermarket splitter behind the blade.  And be careful out there.
By the way, the way you know you are pretty far gone is when something bad happens, all you can think is “Oh wow, that’s a great blog entry”.

Thursday, January 12, 2012

Woodworking Resolutions for the New Year

 Here are some resolutions for this woodworker for the New Year. 


1. I will find some good classes to go to. Highland offers a wonderful range of woodworking classes with the added advantage (for me) of no air travel, and no hotel bills since I can come back to my own house every night. In addition, I plan to look into the John Campbell Folk School https://www.folkschool.org/ just over the Georgia line in North Carolina. They offer a wonderful range of classes from a weekend to a full week on a wide variety of subjects from kaleidoscopes to quilting to calligraphy. I kinda like the fly rod stuff. Room and board are included in their fees and you stay in a dorm on site and eat family style in the dining room. To be fair, for lunch Highland points you to the saloon next door where you can eat family style with your class and quite often the instructor too.

2. I will clean the filters in my dust collectors. I looked up at the ambient air cleaner in the ceiling of the shop the other day and it must have a pound of dust in it. The filter is two inches thick and it costs upwards of thirty bucks when you buy a new one. Sure would hate to ruin it.

3. I am moving out all the plywood and pegboard that I have in the shop. I do not like plywood and I do not like things made with plywood. I had some plywood imported from Russia one time and it smelled like a wet dog whenever you cut it. Pegboard is a project killer for me. I am going to stick with real wood and concentrate on “fine” woodworking (whatever that is).

4. I will finish my sculptured rocker, the one on display at Highland. I want to rock in that bad boy and I want the right side to match the left side when I finish it.

5. I want to turn a hollow vessel. It is one of the many gaps in my turning skill set and I just think it is something I need to do well before I can rightfully call myself a woodturner.

6. Add the skew to that. Still working on that boy.

7. I plan on cleaning the shop very well at least one time this year. I will get down on my hands and knees with the shop vac and clean every square foot of the floor. I also think it may be time to throw away all those cut-offs I have been saving for heaven knows what. They tend to build up over the years, especially since I really hate to throw wood away.

8. Clamps are all over the floor. I have no good place to store them and it would be a real joy to have them in one place easily and quickly accessible to a project. I may do a cart or I may try to clean off a wall somewhere and build a wall rack.

9. My son laughs at me all the time for the roll top desk which has been about 85% finished for the last 15 years. Perhaps this is the year. Course he claims it is such a tradition seeing it there unfinished, he would really miss it if it got finished and moved up to the house. Oh yeah, there is a tilt back rolling desk chair which is only partially refinished. And the new mahogany writing table. Oh, and the oak barrister’s bookcase. The second cherry Shaker candle stand. The walnut school house clock. Plus about twenty bowls. Better be a long year.

10. I’m going to fix the work table behind the table saw. Right now, it is about four inches higher than the table saw, so if I want to use it as support when I push a board through the saw, it is too tall. (Really helpful if I ever have another piece of plywood in the shop.) Plus right now it has all those bowls and the clock on top of it in the way. I plan to clean it off, level it up and then mark the legs for cutting to the saw height. Same way you level a chair.

11. And last, I want to learn to make my own custom moldings. I find the subject fascinating, both for the detail involved, the lack of noise and dust, and the universality of the methods used. It appears that virtually any molding can be made entirely by hand and with a few of the right tools, it is achievable by most of we amateurs. Go look at “Big Pink” (don’t ask) on the blog http://musingsfrombigpink.blogspot.com/2011/11/result.html. Course he sells the tools also.

12. Oh yes, I want to learn the bass guitar. I find myself picking out the bass line in any song and in another life if I could choose, I would like to be able to sing bass in a Southern Gospel Quartet. Here’s what I mean: http://www.youtube.com/watch?v=LhAqojyHhc8&feature=related Whenever I find myself playing a little air guitar, it is always the bass line. I’ll never be able to sing it, maybe I can learn to play it.

Monday, December 19, 2011

Using Woodworking Skills for Habitat for Humanity

It occurs to me that many of the people who frequent this Blog would be interested in one of my favorite things, i.e. Habitat for Humanity.  Not to be bragging, but I am probably up to 75 houses that I have worked on in some fashion or other over the years.  A few more and maybe I will learn how to actually build a house.  Let me tell you about it.

The system is pretty typical around the country.  A corporate sponsor or group or individual comes forward and offers the money needed to purchase the land and the building materials.  Then the sponsor or group will collect volunteers (that’s you, Pilgrim) to come and actually do the construction work.  In my local Chapter, we look for about 30 to 35 people per day on the site, and we schedule about ten days to complete a 1400 square foot house.  The Chapter obtains the land and the building materials, the permits and licenses, and provides essential construction expertise.  The skilled trades which require licenses will be hired by the Chapter.

Once everything is in place, construction begins and that is the really fun part.  Day One and Day Two are the best.  In our Chapter, we are sorely disappointed if all the walls are not standing by the end of the first day.  Roof trusses are usually scheduled on Day Two  and the rest of the work proceeds from there.

One of the real joys of the construction time is working with the family who will live in the house.  A requirement for purchasing (that’s right — purchasing) a Habitat House is the sweat equity investment.  Before we will sell the house to a family, they must put in 250 hours (logged in and out) working on either their house or someone else’s Habitat house.  Plus they must attend a 50 hour course on financial management as taught by Dave Ramsey of radio fame.  Once they have made the hours and completed the course work and shown they can handle the payments, then we sell the house to them for the cost of materials and land.  We provide a twenty year mortgage at zero per cent interest.  At the end of twenty years, the house belongs to the family with no further obligation to Habitat.

But then, you ask, if the materials are furnished by the sponsor, and the labor is all volunteer, why is there a mortgage?  The answer is that we take the money which comes in from the mortgages, pay a minimal staff, and then use the rest as seed money to build more houses.  It is somewhat like a benevolent Ponzi scheme.  Our Chapter for instance has built about 125 houses so we have around 125 mortgage payments coming in each month.  Larger Chapters have built 1500 or more houses.
Habitat works all around the world.  In fact, as a salute to our Christian beginnings, we tithe our monetary donations.  Turns out you can build a house in Guatemala for about $3000.  As a result, Habitat International recently celebrated construction of its 500,000th home.  Corporate Donors also step up constantly.  For example, Whirlpool Corporation donates a stove and refrigerator to every single house built in America by Habitat.  When we finish a house, we call Whirlpool and they send them out.  That’s why I buy Whirlpool every chance I get.  Blessings on them and hundreds of others who do likewise.

How do you fit into this scheme?  Call your local Chapter and see what you can do.  Start by showing up on the site one day to offer your labor in construction.  Look around and see what they need.  What you will find is a bunch of good people doing something they love for the benefit of someone who will never have a  home any other way.  Match your skills to their needs and it will be a good thing for both of you.  Go do some good!!


Our latest house, sponsored and built by employees of Delta Airlines in Atlanta.

Christmas Wish List

Christmas is coming and it is time to look at the old wish list.  My family laments the fact that I have all the $30 woodworking tools.  Anything I still need/want is going to be more.  Assuming you have been a good boy or girl, perhaps it will be a fruitful year in the workshop.  For the sake of any of you friends and family (particularly my son Jon) who might be looking for something to grace this old blogger, here is my list for this year.  Maybe there is something you might like on my list.

1.   I would like to be able to write songs like Brian Wilson of the Beach Boys and sing like George Younce of the Cathedrals.  Oh wait, did you say this was a Wish List for a Woodworking store?  Sorry, those two just slipped out.
Steel City Hollow Mortiser

2.   Hollow Chisel Mortiser — Highland has a top notch power mortiser from Steel City for $299.99.  I saw it in the store this week and it is high on my list.  If you do a fair amount of mortise and tenon joints, then this tool may be just right for you.  It is bench mounted and has a rack and pinion adjustable fence for easy alignment.  The handle adjusts to six positions and is reversible.  The switch is right up front and easy to reach.  The bits lock into the spindle and there should be none of that twisted bits stuff which is so irritating on lesser models.  This thing looks like an excellent medium duty machine for the serious amateur mortise maker.

3.  ANYTHING from Festool.  I have not started my Festool collection yet, but these tools are always on my list.  Given my choice, I would start with the chop saw, then the router, and then the sanders with the vac.
Shaping a Rocker

When I was working on my rocking chair, Charles Brock in his shop had the heavy duty Festool sander hooked up to the Festool vacuum and it is a sweet operation.  Probably not going to happen this year, but perhaps if I am very, very good next year.

4.  Sawstop Table Saw —  Highland can ship the SawStop Contractor Saw to all the lower 48 states now and if you are looking at a table saw, you owe it to your spouse and family to keep all your fingers.  Touted as the safest table saw out there, don’t ask for any other saw without looking seriously at this one.  Watch the famous hot dog video, (or the chicken leg demo) and you will be a fan.
Fein Multimaster Tool

5.  Fein MultiMaster — I have seen the commercials on TV for this thing.  What really convinced me, however, was when the construction manager at my Habitat for Humanity chapter pulled one of these out of his truck.  We needed to notch out a board to set a marble counter top, and there was no good way to do the work without tearing half the wall down.  We turned this thing on and in about 30 seconds, the job was done.  Be careful, though because there are many lower-quality imitators out there, ranging from the $29.95 version at the tool discount store to somewhat more expensive models from some of the major manufacturers.  The real thing may seem a little pricey, but it is worth every penny.  Also do some research on the blades, because there is a very wide range of quality available in blades and they can be a costly error if you get the wrong ones.  The Fein Multimaster model I would like is the FMM 250Q Select Plus kit, which until recently sold for $329, but is available at Highland right now for $299.  It should do almost all I need right now, and I can always buy accessories for it as I need them.

6.  Auriou Chairmaker’s Rasp Set — If you have never used one of these things and all you have ever tried is one of those five dollar rasps from the local hardware, then you are in for a revelation.  I had never used one of these things until I worked on a sculptured chair.  Who knew that the single biggest issue with one of these beautiful tools is you have to be careful to not remove too much wood.
Auriou Chairmaker's Rasp Set

How many hand tools do you use where taking off too much wood is the main problem?  Most of the time, I have trouble just getting tools to cut in the first place.  Well, you say, I sure as heck ain’t paying that much money for a stupid rasp.  Well, nay, I say, nay!  First of all, these rasps will last the rest of your life and your children will bless you for them.  Second, once you try them you will wonder how you missed them your whole woodworking life.  Just try one and you will agree with me.  (By the way, Jon, I like the set of three for $349.99.)


There you go.  Slide this list under the door for somebody, or leave it open on the computer.  Or print it out and leave it under the breakfast cereal.  If you don’t score any of these things this year, try being gooder next year.  I’ll let you know how it worked out for me.

Thursday, October 20, 2011

The Fullsized Finisher

Did you ever notice how we have these woodworking cliches? We never “grab a chisel”, we always “grab a sharp chisel”. Let me think about that for a second. I want to make a fine paring cut on a piece of hard maple, so I think I will get my dull chisel. In my profession, the Attorney General of the State of Georgia got involved one time in a legal opinion about Land Surveyors. Question was whether we had to call ourselves “Registered Land Surveyors” or simply “Land Surveyors”. His legal opinion was that if you were not registered then you were not a land surveyor. There are only “Land Surveyors”, and any label past that was superfluous. I agree — no more “sharp” chisels, only “chisels”.
Same thing happens in woodturning — we never have a catch, we always have a “nasty” catch. I agree that catches are always nasty, and I still hate them. They scare me pretty good most of the time.

Full Finisher
I was practicing last week with the next tool in the Easy Wood Tool group, the Full Finisher.  Watch the video below and you can see how it works. It really is a smooth cut and you can get quite aggressive with it. The piece was wet, ash I think, and I had roughed it out a few days before and then put it back on the lathe to round it off and thin it out.
What I think a lot of woodturners miss is listening to the sound of the tool cutting. You can tell a lot by the sound the tool makes as it cuts. After a while, the tool makes a steady droning sound and you can tell when you get some wobble in the shape and the tool is not following very well. You get a little bit of that high pitched wail from movies set in the Middle East where the men are going off to war and the women are cheering them from the top of the cliffs. Listen to the sound I left in the video and you will see what I mean.
I went to a class with a bunch of beginners one time and the sounds in the room drove me up the wall. Even at that early stage of my turning career, I could hear the pieces beginning to break apart, but the people doing the work had no idea what was about to happen. Now and then one would explode and fly all over the room, but somehow that was easier to take than waiting for one to bust once I heard that sound.
I think I overstepped the capability of the Easy Finisher with the size of the bowl I was using it on. Probably overstepped my capability also. I went back to the Easy Tools web site and watched their demonstration again, and they were working on a smaller bowl. I think that may be the key. That and a lot more practice.
It is hard for me to watch the video cause I know what’s coming. Maybe we should call all catches nasty. Least I didn’t cuss, I just hollered. Or screamed like a little girl, whichever you think. Let’s see what you say if it happens to you.

Tuesday, May 24, 2011

Tool Kit

Sometimes I worry about us woodworkers.  We tend to go off to our shops and isolate ourselves from the world.  (Did you hear about the guy who always stayed at home because he didn’t want to have to kiss his wife goodbye?)  As a follow-up to our safety week and as a public service, I call attention to a bulletin issued last week by the Center for Disease Control and Prevention in Atlanta.  Use this information to stay safe and keep buying tools.

The Festool Contractor's first aid kit may not have zombie antidote, but it's got everything else you might need!
The CDC issued guidelines to follow in case of a Zombie Apocalypse.  (You may think I am making this up, so here is the actual real link). This warning really hit home with me since my shop is in the back yard in the deep woods so to speak, and it can get really spooky (not to mix metaphors) out there at night.  After dark with the lights on in the shop, you cannot see what is going on outside, and when you get absorbed in a delicate little dovetail joint, the whole world could end around you and you would hardly know it until it was too late to do anything about it (as if you could).  I have often wondered what steps I would need to take in case zombies (the technical term for the condition is Ataxic Neurodegenerative Satiety Deficiency Syndrome) showed up at the shop.  For instance, the CDC recommends that you set up a meeting place outside the home so your family can rendezvous and escape together to a zombie-free refugee camp.  They post a list of supplies to take with you including water and food and a first aid kit, though they do admit that once bitten the first aid kit will not be of much use.

We agree with the CDC.
The thing they are missing though, is defensive tools to protect yourself from a zombie attack.  I think woodworkers are particularly well-equipped to protect themselves with things both portable and effective already in nearly every woodworking shop.  My lathe skew chisel (properly sharpened) with its slanted blade and sharp point would be very effective in zombie defense.  My battery powered drill (I will need to keep the batteries charged better than I normally do) with a two inch spade bit would be helpful.  Oh wait, how about the drill mounted three inch hole saw -- I think that would be better.  The battery powered reciprocating saw is an awesome tool, effective in many situations where no other tool will work. If you have ever caught your finger in one of those Japanese cut-off saws, you will recognize what damage that thing could do when properly applied to larger fleshy appendages.  And as in most woodworking operations, having this saw cutting on the pull stroke makes it much easier to use when you are in a rush to finish a project.  Last but not least, is my chain saw.  I prefer a 20 inch blade to give me a little more depth of cut, and you don’t need a really big saw -- too heavy to lift to shoulder height on a continuing basis.  Just make sure it has the proper gas and oil mix so you can get it started easily.  When you need it, you need it quick.

Get your zombie apocalpyse 'Go Bag' ready!
I am going to recommend to the store that we put together a Highland Zombie Apocalypse Preparedness Kit.  It should include all the materials recommended by the CDC, plus the things I have suggested.  I think we will put  it in a big tool bag so you can grab it and go on short notice.  The problem with that is you will not be able to use the tools from the Kit without taking a chance on missing some of them when you have to leave in a rush.  Just use them and  put them back in the Kit when you are done.  We are open to suggestions here people.  Send us your ideas and perhaps you will see them incorporated into our Kit.  Now go fuel up the chain saw.  Be prepared!!  Stay safe.  Keep your brain.

Monday, April 11, 2011

Skew Class: Conquering my Fears

I hesitate to say I have tamed the skew, but at least I can live in the same house with it now.
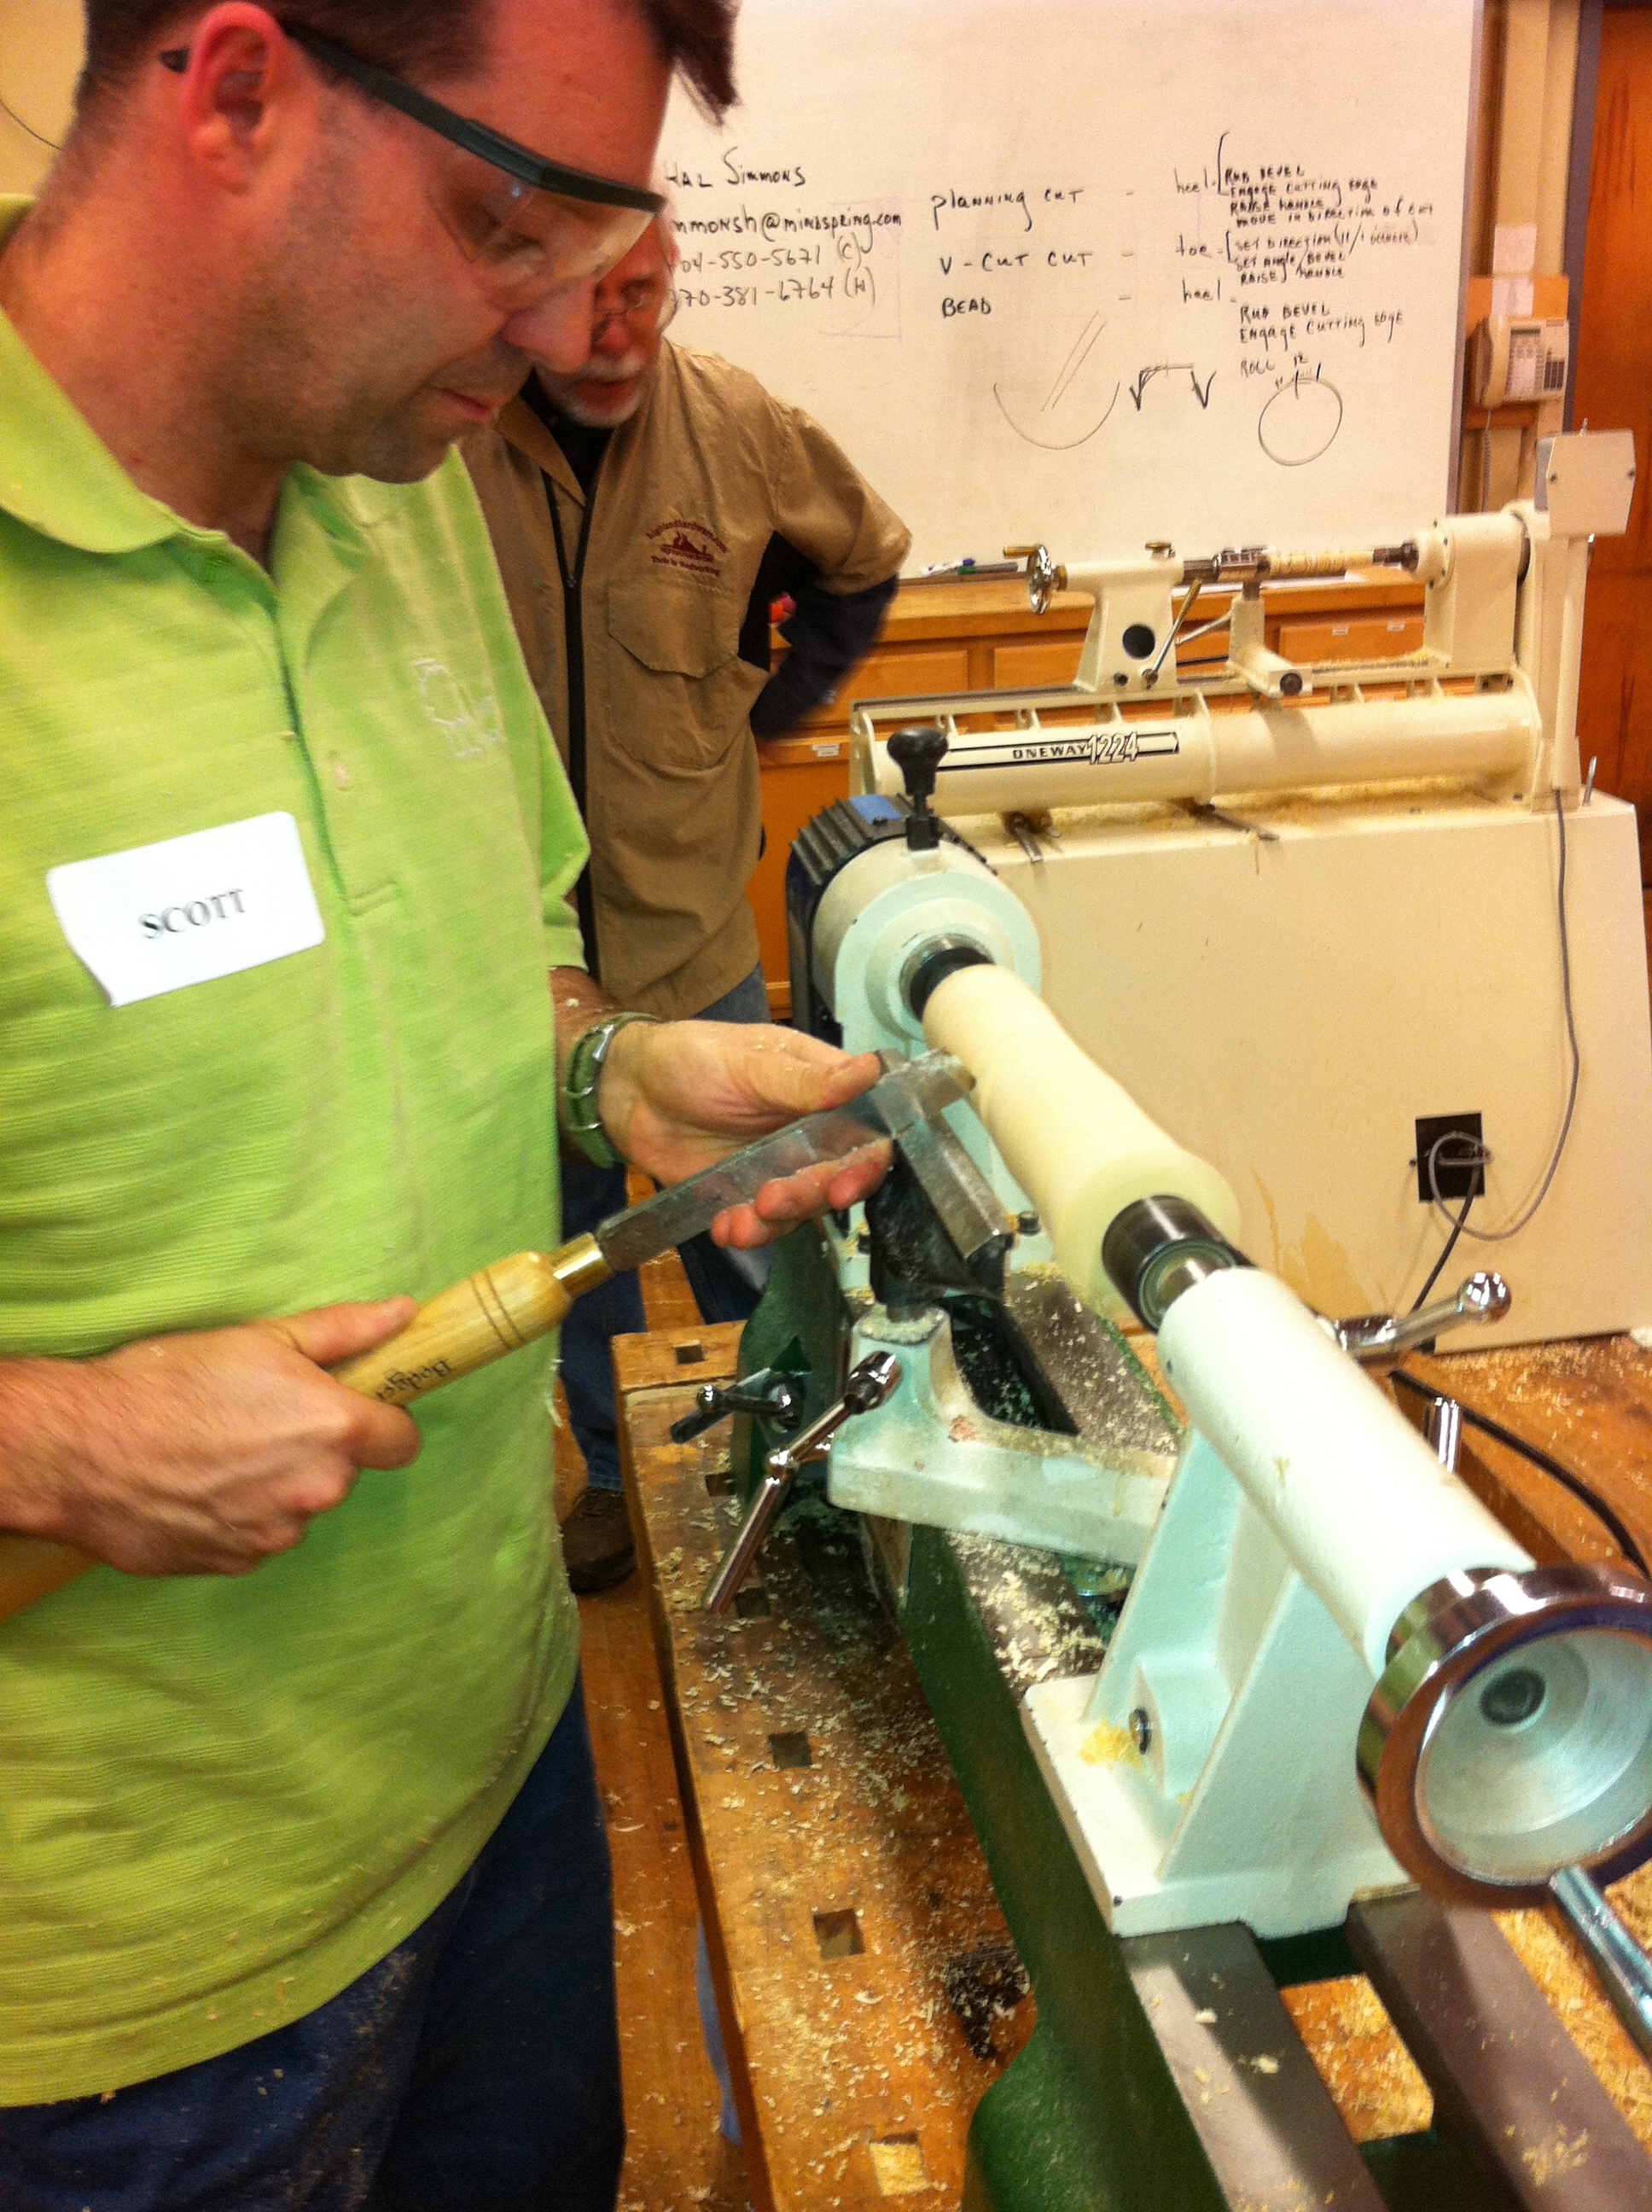
I went to the “Taming of the Skew” class at Highland last week and we spent three good hours with Hal Simmons, a professional turner, to try to solve some of the problems many people have trying to use a skew chisel.
We started out by learning how to sharpen the thing, first on a grinding wheel and then to a flat stone.  As with almost any woodworking operation, having a sharp tool is a good thing.  Hal asked each of us in turn what experience we had and what our issues were with the skew. After some discussion we moved to the fun part and we all got a good laugh.   When Hal had a square piece of wood set up in the demonstration lathe, he turned the lathe up to very high speed and prepared to stick the skew into the wood.  The whole class scattered like a flock of buzzards when a car comes along and Hal was standing there by himself.  Apparently we all shared the same fear of the skew.

Trying to Tame It

Once he calmed us all down and got us back to the demo lathe, he demonstrated how to use the skew to round off a work piece.  He was standing there rounding that wood and not even looking at it,  and we were all standing around with our mouths open and pleading with him to watch the work, because we were absolutely positive we knew what was going to happen and it was not going to be pretty.


On The Way to Carnegie Hall
After we learned the basic planing cut, we moved into cutting a groove and then to widening that groove into all those beautiful shapes found on candle holders and chair legs and balusters.  The cuts are simple in theory when explained well, but as with most skills, take a while to develop the proper motions.  It's the same answer you get in New York City when you ask someone how to get to Carnegie Hall.  Practice, Practice, Practice!
At least I am not afraid of the tool anymore, and with a lot of practice I should be able to make some nice stuff.  What a great class and it is offered every few months at the High.  It runs from 5:30 to 8:30 in the evening and only costs $75. Go ahead, tame that skew!!

By the way if you are a Kindle owner, click over to Amazon and check "Blogs" for Kindle and look me up.  You can subscribe and have this automatically downloaded into your Kindle.  See You There!!

Wednesday, March 30, 2011

Router Table, Router and Custom Moldings

Router Table Setup

Don’t “Duh” me please.  And why would you say “Duh”?  Because it took me this long to figure I can make my own moldings.  Until the last couple of years I only made things where I could use stock moldings from the big box store.  That beginning point limited me severely and I could only do things which were going to be painted or where finger joints are acceptable (a small portion of fine woodworking to be sure).  I finally figured out from watching Mr. Norm and then getting a good router table in my shop that I can make many very nice moldings out of any wood I choose.  And I don’t have to paint it or try to explain to all my friends that finger jointing is a tree saving environmentally correct methodology and the reason I am charging more for my work.

Over the past couple of months I have been making some small furniture pieces for my church and I wanted them to match the existing pulpit furniture.  Both of the latest pieces are from oak, one red oak and the other quarter sawn white oak.  Needless to say, there are not many custom moldings from those two species and I really wanted them to match.


Can’t buy this!
A few months ago, I purchased the Kreg router table with a new Triton Router from Highland.  What a beautiful setup that is.  I already had a set of half inch router bits and I figured I might as well try the molding process.  It worked!!  I came up with some beautiful stuff and it made the finished project look good.  What works for me is to plane a board to a good thickness and then rout one edge (or both edges) by running it at the router fence.  I then cut the molding off the edge of the board at the table saw and it is done.  I can make as much as I want and it is always the right size and species for the project. Miter it up, nail it up and stand it up.


Waiting for Stain and Finish

One of the great joys of woodworking is doing the final fit of those last little delicate moldings on a project.  There is a timelessness about it which feeds my soul, particularly when I think about spending an extra half hour doing something really well, so people a hundred years from now will touch it and run a finger along it and recognize that someone cared enough to do it really well. Isn’t that why you do woodworking?


PrintFriendly

Monday, March 21, 2011

Redacted Furniture

Do you know what it means when something is “redacted”?  I think of  documents the federal government reluctantly gives up under the Freedom of Information Act where they don’t want you to know what or who they are talking about, so they black out every other word of it and send it to you so they have met the letter of the law but you really don’t know what they are talking about once you see it.
Last year I found a new sales avenue for my Etsy site.  I wanted you to know about it, but I don’t want you intruding on my sales so I decided to write about it and then redact it.  Here it is.

Candle Stand
It turns out there is a pretty good market for we semi-pro woodworkers in the _______ furniture market.  This all got started last year when my son graduated from a Master’s program and at his first job decided he needed a candle stand to enhance the services.  He and I designed one and I mocked up a couple of them to get the scale right and then made one to match the _______ furniture where he works.
I popped it up on my Etsy site and lo and behold, I sold five more of them all over the country.  Actually got tired of making them before it was over.  Then last summer, one of the _______ who bought a candle stand wanted me to make an Advent candle stand to match their _______ furniture.  That turned out pretty well and they were happy with it.  I left it up on the Etsy site and maybe next year I will get some additional sales out of that one too.  It is such a thrill to know that _______ all over the country are using my stuff.  I’m making two more this season, one for my own _______ and another for a friend up the road who is Pastor of a _______.

Advent Stand on the Left (Sudbury UMC, MA)
In making the new stands, I found a new router bit.  When I make a column of four pieces joined at right angles, a lock joint router bit is the thing to use.  These bits cut a joint with a tongue and a slot which fit together when turned at ninety degrees to each other.  The joint locks together and is so firm that clamping is almost not necessary.   The bit is a little bit touchy to set up correctly and it does require a router table.  But man, this thing works like a charm.  You can buy it at Highland.

Lock Miter Bit
The point of all this is you never know where sales  will come from.  There is a market out there for your stuff – you just have to find it and work it.  Buy more tools, make more stuff, sell it, and buy more tools.

Thursday, February 3, 2011

Taming the skew

Ok, let’s get all the puns out of the way.  Try not to skew this up.  The taming of the skew.  Situation normal, all skewed up.  Is that all of them?  Can you think of any more?

Can You Do This? Scares Me to Look at the Picture!!
What all this is coming to is, I am finally taking a turning class on using the skew.  Can we be honest here for just a moment?  I am scared of the thing.  I won’t use it in my shop.  When I pick  up my skew, it catches  before I even walk over to the lathe.  You can imagine what happens when I actually touch the wood with it.  Then when I finally turn on the lathe, well, things just start to happen without warning.  I watch other people use it and it is magical.  They make all those coves, rounds, and steps and it is beautiful and so beyond me.  When I took Peter Galbert’s chair class last fall at the High, he was the best I had ever seen with the skew.  We had the option of bringing our own premade chair legs or using ones Peter made for us.  I would have been out of luck if I tried to make my own before the class.  Just for funsies, Peter made a chair leg during the class and I couldn’t believe how quickly and easily he turned it out.  Wow!!   After he completed it with just the skew, it was so smooth that he had to rough it up (not smooth it out, mind you) with sandpaper so it would take a finish.   I may get there in about ten years of practice.
On February 9th Hal Simmons will teach a class at Highland on Taming the Skew.  It is three hours from 5:30 to 8:30 pm.  When I was in the business world, our staff sat down together and took a careful inventory of all the skills we needed to satisfy our clients.  Any skills we did not have, we acquired by either hiring or training.  I look at my woodworking skills the same way, except I don’t plan to hire anybody.   That is why I keep a close eye on the classes offered at the Highland web site.  This class will complete most of my turning skills and after that, it is a matter of practice.  Sometimes you just need a little bit of help to keep from really skewing something up.  Come on down and meet me there.

Monday, February 22, 2010

I Meet thomas Lie-Neilson

Who is the most well known person you ever met?  I met an ex-Senator once at work, and I was with a Congressman the other day when he brought a large check to our community.  Millard Fuller, the founder of Habitat for Humanity came to town a few years ago and he autographed the hammer I use to help build Habitat houses.  I should have framed it (no pun intended) because Mr. Fuller died awhile back, but it is too expensive not to use.   I do think he would want me to continue to use it to build houses. 

When I narrow the field to woodworking, I met Norm Abram once, and I've taken a class at Highland from Roy Underhill and another one from Mike Mahoney.  I read several books by James Krenov and bought one of the planes he made, and once I sat in that Sam Maloof chair at Highland.

Thomas Lie-Nielsen
Then a couple of weeks ago, I dropped by the store and got to meet Thomas Lie-Nielsen, founder and owner of Lie-Nielsen Toolworks and maker of some of the finest woodworking hand planes and tools made in the world (and they're made right here in America, up in Maine).  He was in town to teach a class at Highland, and also gave some hand tool demos at the store's big winter sale day the day before.  I stand in awe.  Everybody in woodworking knows about these planes and they are beautiful. 


Lie-Nielsen No. 102 low angle block plane
I picked one up and the weight and feel is such that you just know they are the best.  The finish is outstanding and the blades are honed to perfection.  After I picked out the one I wanted, a No. 102 low angle block plane, Thomas autographed it for me with one of those electric engraving pens right on the spot.  I suppose I will have to decide whether to frame this one or actually use it like I do with my Fuller hammer. 

Given enough time and energy, I can pretty much make anything I want out of wood.  But when I look at one of these planes, I cannot even imagine how to begin.  The scope of the metal work, the foundry work, the machining, the fitting, not to mention the actual design to make it beautiful, is just beyond me.  Then on top of all that, it has to cut wood perfectly.  Oh, and by the way, the Lie-Nielsen factory makes a hundred planes a day, which to me is amazing!

I really enjoyed talking to Thomas and I admire his work, but I feel like he did leave all of us short on one thing.  Go look at Chris Schwartz, the editor over at Popular Woodworking magazine and see the clip of him throwing double bit axes at a target.  Thomas taught him how to throw this week when Chris went to visit the Lie-Nielsen factory.  (By the way, we've got plenty of those kinds of axes at Highland. You'll need one of the double bit ones.)

It just occurred to me to wonder: Will Thomas ever be back down here to show the rest of us how to throw an axe?

Thursday, January 21, 2010

Tool Ignorance vs Tool Stupidity

All woodworkers know if necessity is the mother of invention, then laziness is the grandfather and stupid is the father.  (I think I'll try to get that added to Bartlett's Quotations.)  All jigs, templates, shortcuts, power tools, dumb moves and safety practices are heirs of this illustrious family.  

I must admit that grandfather laziness is high in my gene list, but father stupid works quicker for me than the other two.  Fifteen years ago, in the very first two minutes I had my brand new table saw in the shop, I stuck a scrap of 1/4 inch plywood in the blade free hand.  It kicked back into my midsection and the palm of my hand and I learned a good lesson very early.  I instantly gained an immense respect for the tool with thankfully little damage.  Good lesson not soon forgotten. 

band saw.jpg
Long as we are on stupid (ignorance can be cured, stupid is forever), I was working on the switch on my new Steel City band saw a few weeks ago, and like a good boy, I unplugged it first.  When I finished I pushed the "on" button to check my work, and to my surprise and horror, the saw started.  Totally not logical and I instantly looked to see the plug still on the table where I put it before starting to work.  Now I only had one course in electricity in college a long time ago, but transmitting electricity through the air is not common even if it is possible.  Soon as I got back from the bathroom, I turned the saw off and checked the cord.  There are two cords on the saw, one to the task light attached to the back of the saw and the other for the saw itself.  They are identical and both were next to each other in a filled four socket outlet.  I had unplugged the light but not the saw.  Another lesson not soon forgotten.  (I taped the cords together so it wouldn't happen again.)

Then yesterday when I put a new piece of old wood on the lathe, I failed to note sufficiently the crack across the top of the wood.  Ever stand out in the yard and watch a vee formation of geese fly over (never do that with your mouth open) heading away for winter vacation?  I remember standing there and watching that chunk of wood fly across the top of the shop like a flock of geese. Seemed like it took a week.  I have learned instinctively to stand out of the line of fire and I always wear a full face shield and thank goodness for that.

spax screws
When it finally landed, I picked that missile up off the floor and screwed it to the wall (love them Spax screws) behind the lathe to remind me of what can happen.  At least there was no blood or brains on it.  Maybe that started curing stupid.
More Free Woodworking Tips

Wednesday, January 6, 2010

Wood for Turning

Do you think you will ever have enough wood? I intend to have way too much wood left over when I stop working.  There are several sources for wood and each has its advantages and disadvantages. Right now let's talk about wood for turning bowls.

The first place you might try is Dave and Sandy's house and get some of what is left of that cherry tree they cut down last week.  They are two of my church friends and they took down a large cherry tree next to their driveway.  I went by with my chainsaw and chopped out some wet pieces of beautiful native cherry and lugged it home.  I dropped it by the back door of the shop and put the bark side up so it could dry for a few weeks.  It has some beautiful crotch wood but lots of soft sap wood and I can't wait to get it turned out. 

The next step up is a raw wood dealer.  I have a dealer I use on a regular basis that used to be a tree surgeon and he has a warehouse full to the ceiling with wood and wood blanks.  The wood spills out into the parking lot and when you go to his place, he's got a better chain saw than you do and you better bring your pickup truck.
 
bowl turning wood
Last week I bought several bowl blanks from the High.   Highland sells woodturning blanks which are either eight inches or ten inches in diameter and three or four inches thick.  They are coated in a waxy preservative to keep them from drying out and they are already made round, something which Dave and Sandy will not do for you.  Blanks are cherry, pecan, walnut, sycamore and maple amongst others and range in price from about $15 upwards to $30 or so.  They are round and flat and ready to turn, though they are green wood and will need to be dried after they are roughed out.  Sometimes a flat round piece ready to turn is a real pleasure compared to a piece of a green stump and a chain saw.    Unfortunately they don't mail order the wood. You have to drop by the store and browse through the blanks in stock to find the ones you want to buy.

bowl turning wood

bowl turning wood

Now the ultimate wood for turning at Highland Woodworking is outside in the enclosed space next to their parking lot, and you have to go to the store to shop for these also.  If you look to the left just before you enter the store's side door, there is a wonderful collection of huge cherry and walnut burls and crotches back in the corner.  At first glance it looks like some kind of wood graveyard, but don't let appearances fool you -- there are diamonds in the rough here.  One of these days if I keep working and getting better at my craft, I will buy one of those wonderful burls.  I will study it for weeks looking for that one make or break cleavage plane.  I will take a thin steel wedge and place it carefully on the burl and I will probably take it away several times before very carefully and firmly whacking it with a little mallet while holding my breath. Course I may just cut it carefully with my chain saw (while holding my breath).  The result will likely be wonderful.   

Wood is everywhere and if you pay attention, you can have plenty of it.
bowl turning wood

bowl turning wood

Gingerbread House

housemidway.jpg
Let's do something different this year.  Aren't you tired of all that sawdust and building those projects out of cheap plywood and making stuff that everybody wows over when you give it to them at Christmas and then you never see it when you go to their house?  I'm like most of you - I build stuff all the time including houses with my local Habitat Chapter.  But the kids and grandkids will remember this project the rest of their lives.

We're going to build a Gingerbread House.  Trust me, it's easier then you think and I will guide you through the process complete with pictures.  You will need to set aside portions of about three days because if you do it all at once, you will get tired of it and mess it up.  Course if you mess it up, have it for dessert, one of the other joys of working with this stuff.  OK, here we go.

Make up a cardboard pattern for all the pieces.  You will need a pattern for the sides 9 ½ by 5 inches.  You need a pattern for the ends, 6 inches wide and the side of the end is 5 inches to match the side.  The gable goes up another 2 inches to the peak.  That makes an 8 pitch if I calculate correctly on my handy construction calculator.  (Pitch is 33.69 degrees - I love that calculator.).  Uncomfortable to stand on an 8 pitch, but if you put the house on the kitchen table and sit in a chair, you will be fine.  Also make a pattern for a chimney.  Cut a notch in the bottom of the chimney ends (8 pitch, remember) and make it about 2 ½ inches tall and then make sides for the chimney tall enough to reach the roof, about 3 inches.  Save the pattern for next year.

You will need a recipe for gingerbread.  All the magazines at the grocery will have recipes this time of the year.  Roll it out (using that rolling pin you made for your wife last year) fairly thin, just under an eighth of an inch, and then cook it pretty hard.  Watch it closely in the oven and when the edges start to turn a little brown and crispy, it should be done.  If it is cooked too soft the roof will sag.  You will need two sides, a front and a back, and two roof panels plus four pieces for the chimney.    The smell of gingerbread cooking is wonderful and will linger for days.  Your grandchildren will tell their grandchildren about it and the wonderful houses you built for them.   

Run down to your shop and get a piece of eighth inch plywood about 12 by 18 inches and wrap it in foil for the base to build your house. 

Go to the big box store (not the grocery) and get a can of "Meringue Powder."  It is made by the Wilton Company and will be in the cake decorating section.  Get a cake decorating squeeze bag and a couple of pretty wide mouth tips while you are there.  You will need to make one batch of "Butter Creme Icing" and one batch of "Royal Icing" based on the recipes on the insert inside the meringue powder can.

roughhouse.jpg
First thing is to assemble the house on your base with the royal icing as a kind of mortar mix.  Give it about 20 minutes and the royal icing will get hard as a rock and hold your house together.  Use the butter creme for everything else and you can ice the yard, set in a fence out of marshmallows and pretzel sticks, make a tree out of ice cream cones with jellybean lights, and then decorate the rest of the house however you like.  Make a woodpile on the side, pave a driveway, make a stepping stone sidewalk, anything you want. Candy canes all over the place.   I love picking out the candy and I spend a good bit of time in the candy aisle trying to picture how the various pieces will fit on the house.  One of my favorite things is to chide everyone about not eating all the candy before we get it on the house, all the time stuffing handfuls in my mouth.  Didn't take long for everyone to catch on to that one.    The final step is to take a sifter of powdered sugar and sift it over the whole thing.  The sugar piles up like snow and the effect is wonderful. 
finshed-house.jpg


Send me a picture.  Merry Christmas to all!!

Friday, December 4, 2009

Leather Apron for Real Men


bandsaw.jpg
You know by now that I do a lot of woodturning, and one thing I do dislike is chips falling down the front of my shirt.  A few years ago I made up a turning shirt by taking two old work uniform shirts and cutting the shoulder yolk and collar off one and attaching it to the front of the other.  It looked like one of those old western movie shirts with the buttons down both sides and a clerical collar at the top.  Worked like a champ, too.

As I got more skilled at turning though, I felt like my attire was holding me back.  Perhaps I could be a better artist if I were wearing a better turning outfit.  So I bought the red turning smock from Highland and whether or not my work is better, I sure do look better when I'm working. 

aproncover.jpg
Now I do have one bad habit when sanding finished bowls.  I tend to hold the bowl against my body while sanding with the electric drill so that the dust goes down the dust collector hose.  Unfortunately, I sanded a hole in my beautiful red turning smock.  You've heard of chiseled abs; I have sanded abs. 

Well the answer to that sanding problem is one of the new leather aprons as found on the front cover of the new Highland Woodworking catalog.  These leather aprons are beautiful!  I went by the store today to look at them and I suppose I am just partial to leather, but when you walk in the front door of the store, there are at least 40 aprons on display all over the place.  (You really need to come see the store at Christmas.)
aprons.jpg
They are made of four basic pieces of leather stitched together with four pockets added to the front.  The two larger lower pockets have riveted flaps over them to keep chips out and the other two are made for pencils, calculators and this time of the year, candy canes.  The back of the apron is the naturally rough leather and the front is smooth and finished.  I looked at a bunch of them before picking the one I wanted and the naturally occurring marks on the leather really add to the appeal. 
apron-on-man.jpg
Some aprons are slightly thicker than others and have more marks, and some are lighter or darker in overall color and appearance.  I was also very surprised when I picked one up and found how lightweight they actually are.  This thing will not weigh you down.  I bet if you call the store and ask them to pick out some particular feature for you, they will do it.   With the light and strong flat straps across the back, and a quick snap connection, the whole thing is supported by your shoulders and still easy to get on and off.  Beautiful!

If by some very small chance you don't want this one, you could get one of the others that Highland carries, such as the ballistic cloth turner's apron, the leather turner's apron, the belt apron, or a regular cloth apron.  But the really good leather ones are on sale, and come on people, this is Christmas.  Get the good one!

Thursday, November 19, 2009

Saw Sharpening Service

Have you tried the new Sharpening Service that Highland Woodworking now offers?  Maybe you didn't know there was such a service available, but there certainly is.  I thought I would give it a try and let you know how it works. 

I had one very dull twelve inch sixty tooth carbide tipped saw blade, and five each  half inch carbide patternmaker router bits, the ones with the bearing on the bottom.  And no, they did not know it was me giving them a test for the blog, as if that would have made a difference.  It was a Wednesday afternoon when I took the whole package to my local retail shipping outlet and asked them to pack the stuff up for me and ship it to the service in New Jersey.  I live in Atlanta so they checked all three shipping options and decided on UPS to get it there on the following Friday afternoon.  They charged me $12.80 for the minimum five pounds plus $2.00 for the box.  Both the other shipping options were within a dollar or so.  (If I'd shipped it myself via Priority Mail using one of the Post Office's free Flat Rate boxes, It would've cost around $5.00 to ship.)

The finished tools came back Thursday a week later.  They are all sharpened perfectly as nearly as I can tell so far.  I used one of the router bits all day yesterday routing the window openings for a new house and it performed very well. 

The charge for sharpening the saw was $22.00 for 60 teeth and the return shipping was $12.00.  Total cost for shipping everything and sharpening the blade was $47.00.  The router bits were additional cost.  Was it worth it? 

saw blade.jpg

The actual sharpening cost is right in line with other services I have checked.  Of course I could take my blades to a local guy working out of his backyard (no offense here people) but two problems come to mind.  If I pay $135 for a top of the line Forrest blade, I darn well am not going to take it to "Ralph's Pretty Good Saw Shop" and take a chance on getting it completely messed up.  Plus if a tooth needs to be replaced, I don't think I want Ralph doing it for me.  One definition of a bullet is a carbide tip coming off a table saw blade. 

The shipping is what adds to the cost.  There happen to be two professional sharpening firms within about forty minutes of my house.  If I deliver my blades to one of them, it will cost me four one way trips plus the time.  On the other hand, my time is pretty cheap these days. 

I conclude that even in an urban area with professional shops fairly close, if I need high end blades sharpened, I will accumulate as many as I can and ship them all together to save on shipping costs. (And if you send them at least five carbide sawblades to sharpen at one time, the return shipping is free.)  I think the service is well worth it under that circumstance.  On the other hand, if all I have is one $35 blade, then I'll probably let Ralph do it.